
Project Ultimate 83 GTI
Interior ...
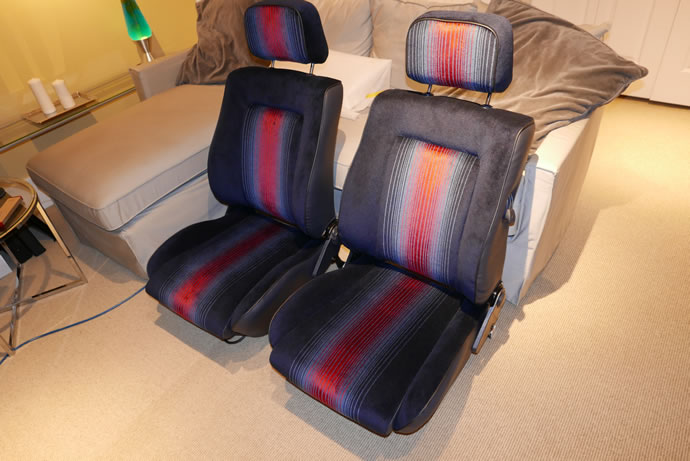
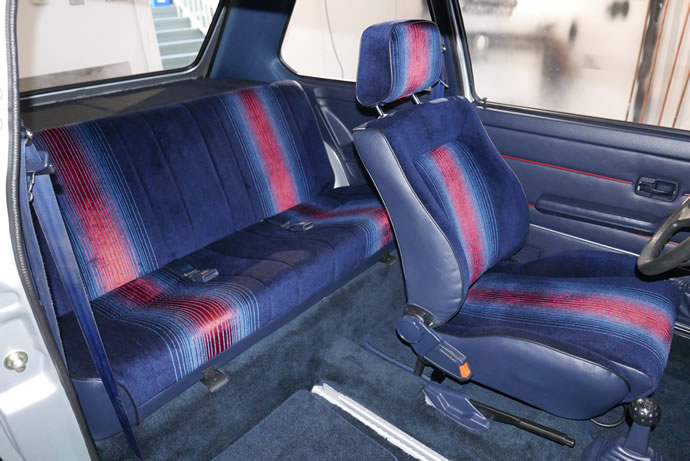
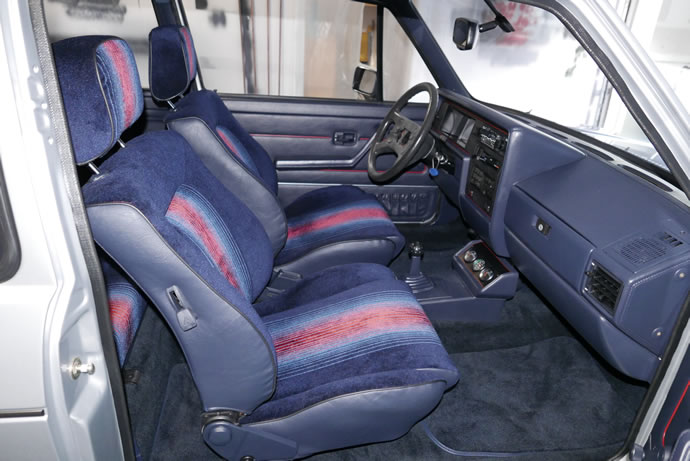
I knew that all of the work to get the car mechanically perfect would be generally hidden from view so I wanted the interior to really stand-out as being ‘mint condition’ all original looking. 35+ year old Mk1 GTIs never have perfect interiors but I wanted mine to be. I must say that I am the luckiest Mk1 GTI owner in North America as I sourced the very last bolt of original factory OEM seat cloth, so the finished seats are amazing. Before the upholstery work was done though, the seat frames had cracked so they were rewelded and strengthened before black epoxy painting, and then new foam was added that has a firm inner core and a softer outer layer to create seats that are very supportive but comfortable – firmer than stock but in the same range as more modern sports-car seats feel.
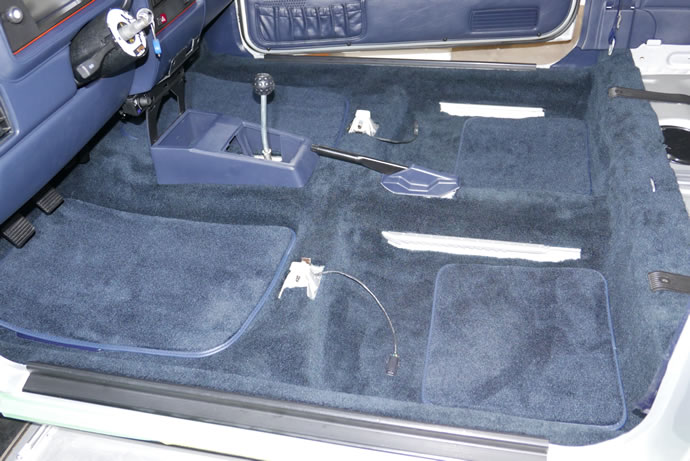
Matching the seats is a plush carpet and new OEM-style headliner. The dash and all interior plastic parts were refinished and re-painted with plastic paint and the results are stunning – everything is ‘as new’, crisp and clean. All rubber moldings have been replaced. The windshield is new, the side window glass has all been re-polished.
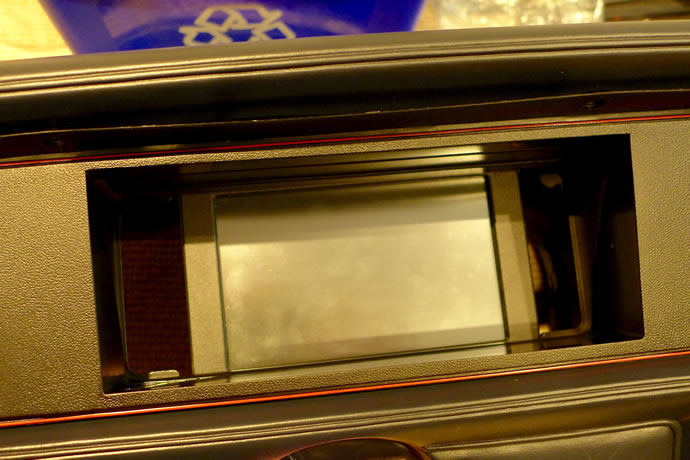
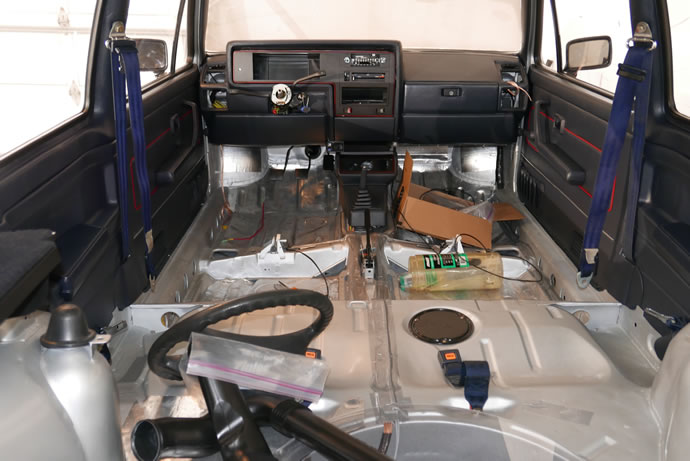
The original dash console has been replaced by a touch screen unit that mimics the original analog gauges. The center of the console now hosts the additional air vents that came with the A/C equipped cars. The little pull-out change drawer below it now hosts the electronic switches and knobs to control various aspects of the ECU – when closed there is nothing the eye can see which would give away the high-tech modern nature of the car …
The windows are now electrically powered; there are front and rear facing cameras that display their images inside the rear-view mirror; the side mirrors now have a convex shape so those tiny mirrors actually show the activities in the lanes on either side of you; mild electric A/C cools the interior on hot days; the 1200W blue-tooth audio system with hands-free cel phone will blow people away; every light bulb in the car is LED based so lighting is crisp and clean, and the OEM sunroof works beautifully with all new metalwork, cables, handle and hardware.
The timeline story of the chassis prep and fabrication process
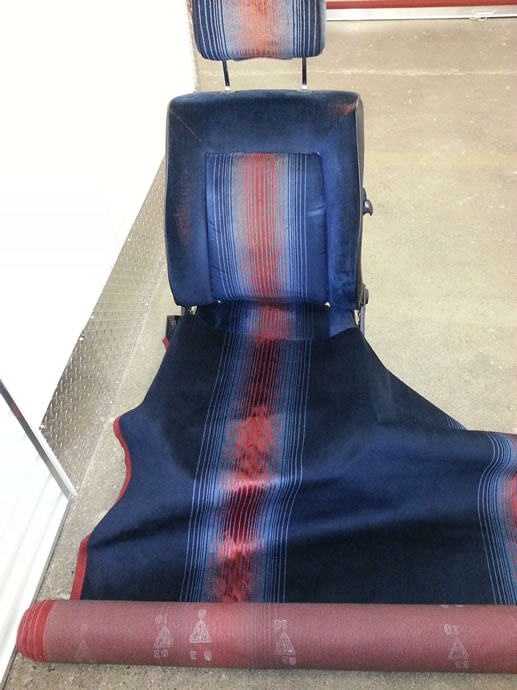
While the original GTI midnight blue seat fabric was in generally good shape, I took the approach of getting SMS Fabrics to custom make all new OEM spec GTI seat fabric material and I am getting the seats, front and rear, completely re-built with new bushings, foam and fabric. I will also install deluxe new OEM looking carpet and headliner. The dash looks pretty good but I will take care to make sure every inch of the interior looks stock and mint. That said, there will be some minor trick additions: a hidden (in the 1 DIN stereo location) Clarion VZ401 flip out 7" LCD monitor audio control unit and a killer audio system using Boston Acoustics speakers, hidden in the stock speaker locations, with the addition of larger drivers under the dash and in the trunk area. Gotta have state-of-the-art sound and Bluetooth smarkphone calls and wireless audio streaming capabilities ...
SMS supplied original OEM VW Rabbit GTI Midnight Blue fabric (so much nicer than the old faded/worn material - it turns out I got the last of it. Oh my!) ...
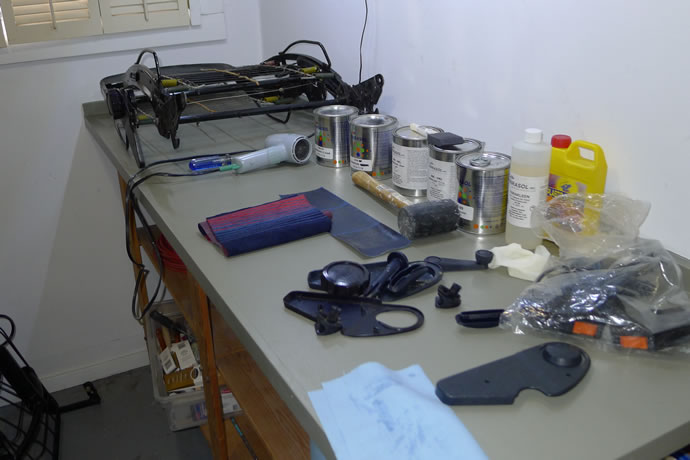
I have been working on the rear suspension system over the past week at the same time that I have been working on the seat frames and replacement foam. I have a great seat guy that has already cut all of the midnight blue fabric and sewn in the 1/4" foam on the backs of each of the 'panels' while I have been welding up the seat frames where they are weak and tend to flex and crack around the tops of the front seat frames. I also custom cut some extra firm foam for the seat bottoms - a tough, delicate process when shaping the side bolsters. I will finish painting the seat frames when my black SPI epoxy arrives and then my seat guy will finish them off. BTW, I was able to purchase new plastic replacement parts from VW Air Heads and will color match them soon. - April 14, 2014
Starting the dying process ...
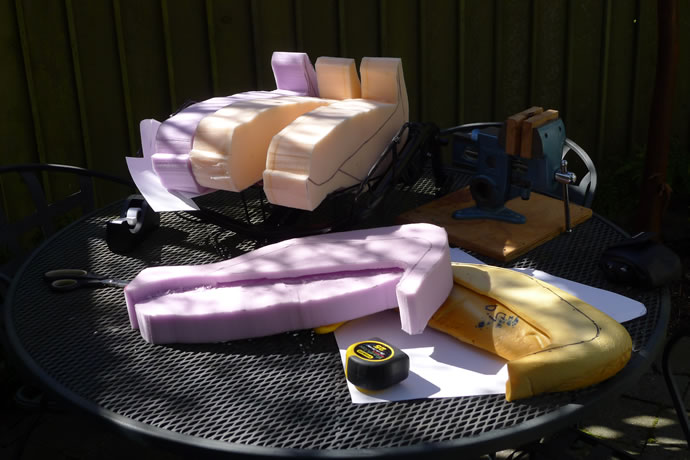
Starting the foam cutting process ...
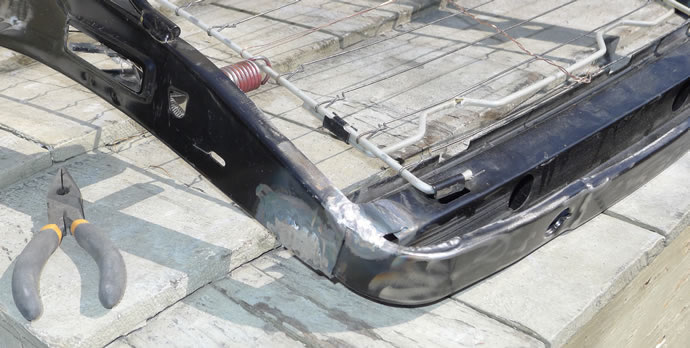
Welding up the tops of the seats ...
The rear seats are now complete and the fronts are 80% done - July 20, 2014
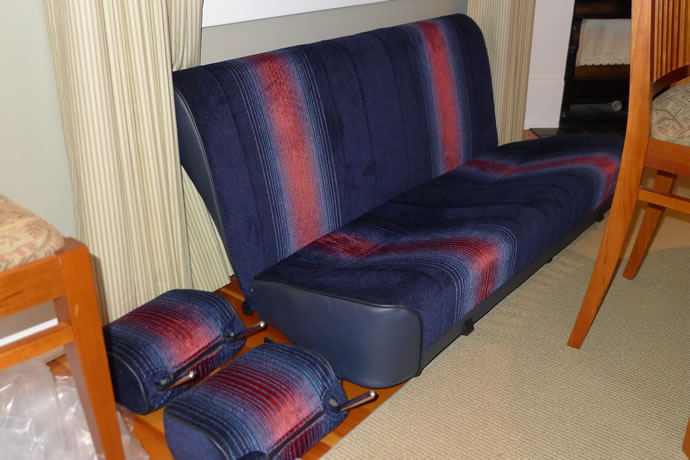
The front seats are also now complete - August 5, 2014

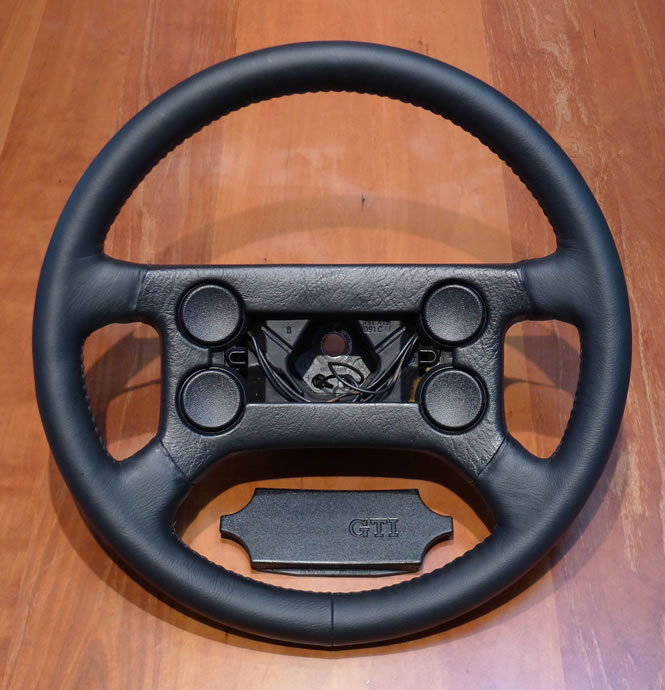
I got the steering wheel back from Custom Craft today: they re-wrapped the wheel with 1mm of foam and then soft leather. I am very pleased with the end result: a very nice feel to it, not too soft, not too firm, just the right diameter, with the stitching where my fingers want to engage it. I will treat the leather to match the soft gloss of the vinyl center section - October 8, 2014
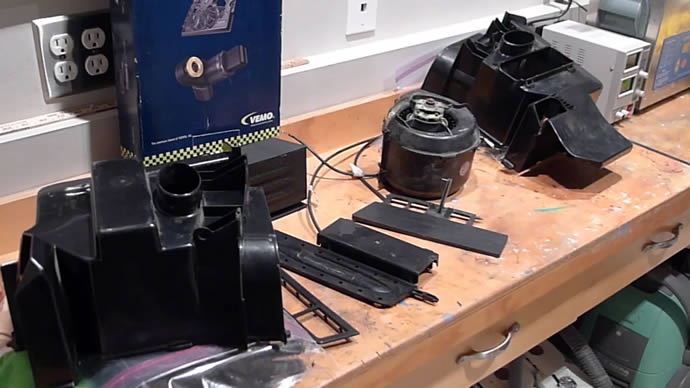
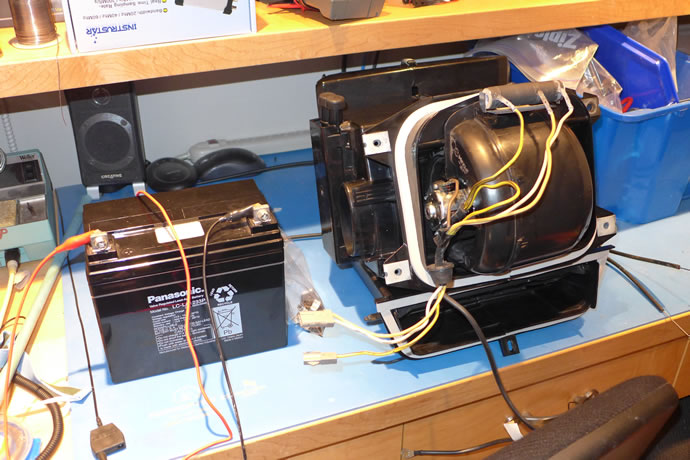
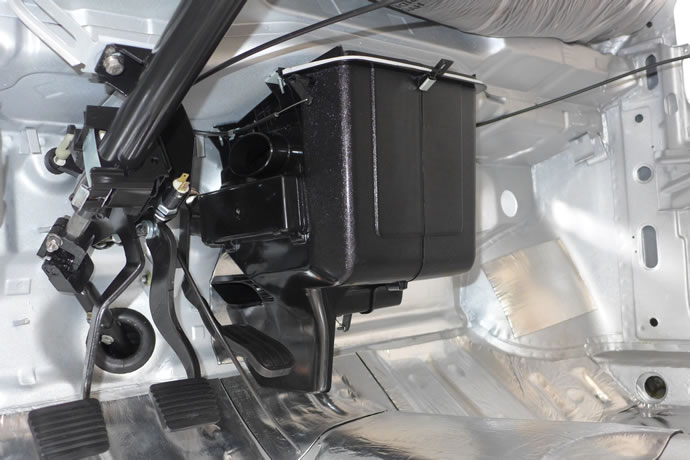
While I patiently wait for the new custom radiator and intake runner collars I have started to rebuild the heater box with a new heater core, blower, foam pads and seals - again, I must wait for the parts to arrive before being able to re-assemble it so I am going to have to find other things to do for the next week - January 8, 2015
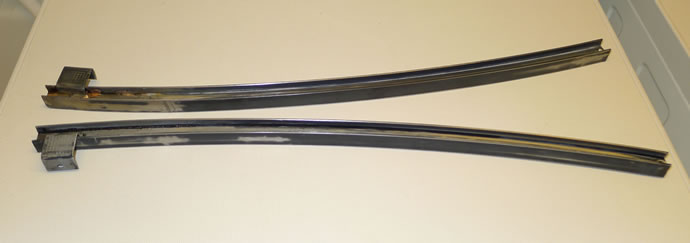
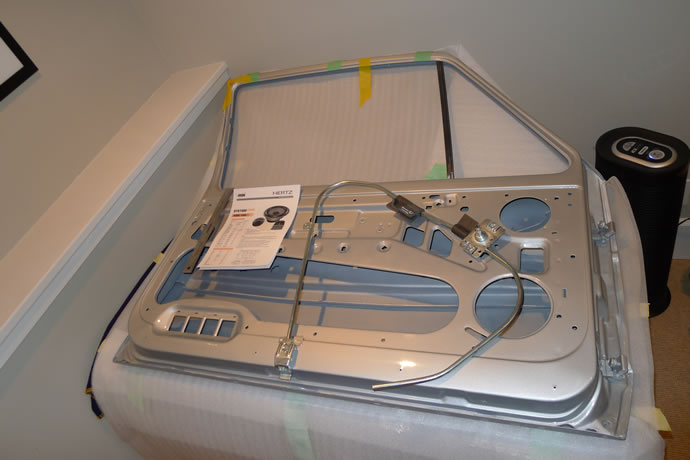
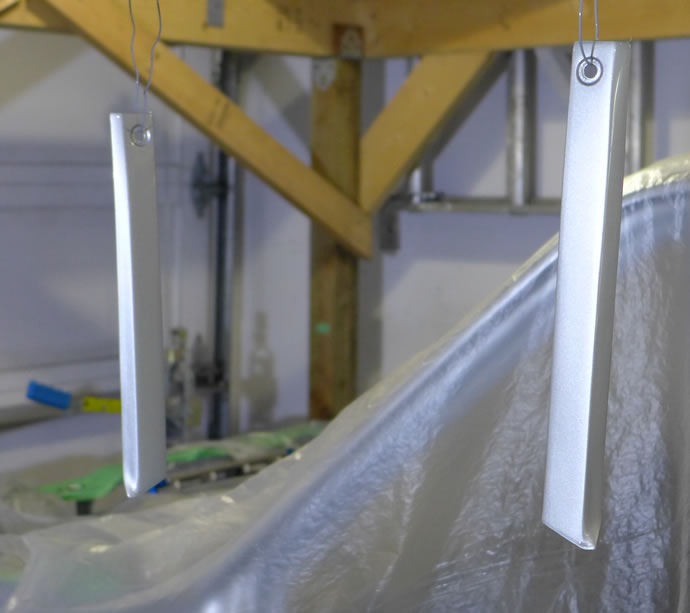
I wire brushed, acid etched and plated the metal h/w for the heater/blower box, and dove into the door assembly/finishing tasks, starting with the reconditioning of the window channel guides which were rotted out on the bottoms and required TIG braising in new metal, filling, sanding and painting, and also got the design for the 2 way component speaker system that will be installed in the doors sorted out (a high end Hertz HSK 165 system with a 6.5" woofer and 1" tweeter - I will also use hertz coax speakers in the stock front/rear locations, plus a Hertz Sub box in the rear that I can remove along with the sub amp when I want less weight for racing, etc). I also got the metal side plates for the front spoiler stripped, acid etched and primed, plus got the mirror bases acid etched and the whole assemblies partially cleaned up prior to painting - January 12, 2015
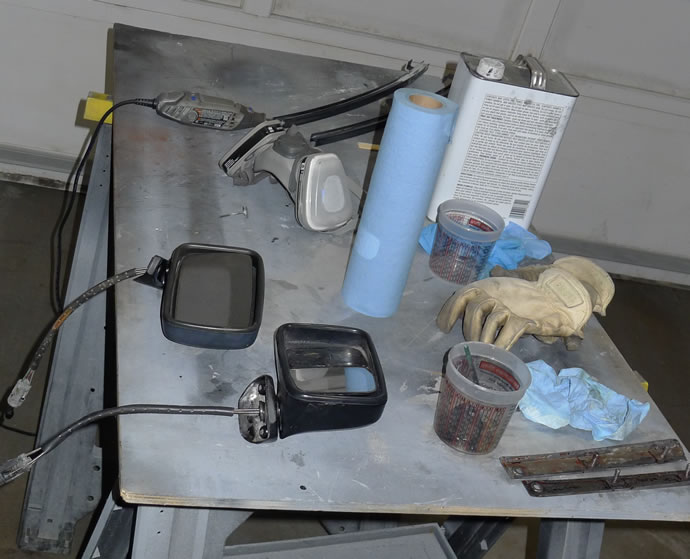
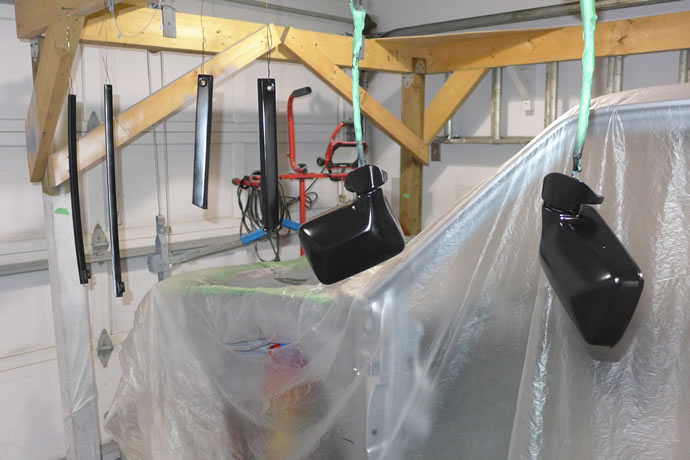
I got the prep and painting of the front window channels, front spoiler side plates, and mirrors completed this weekend. It all turned out very well but I think I will wet sand and polish the black epoxy paint parts as those parts ended up being a bit too shiny for me - I want a semi-gloss look and when you wet sand and polish black epoxy it comes out pretty much exactly semi-gloss (soft gloss) - January 18, 2015
After zinc plating the h/w and cleaning out the heater box, I reassembled the unit with a new heater core, new fan/motor, and new gaskets/seals and tested it out. I also finished drilling the intake air box backing plate for the purge solenoid and mounting h/w, wet sanded all of the aluminum parts up to 2000 grit to prep for anodizing. Best news yet is that my custom radiator shipped out to me Fedex on Friday so I should have it Wed latest and can then complete the cooling system and intake system which are all interrelated. I also received the replacement -20AN fittings from Davis Craig by overnight Fedex (they paid the shipping - 2 thumbs up!) from Australia, no less - February 8, 2015
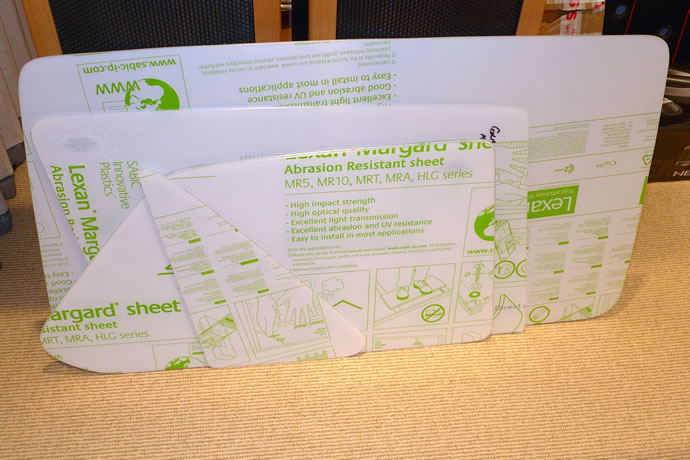
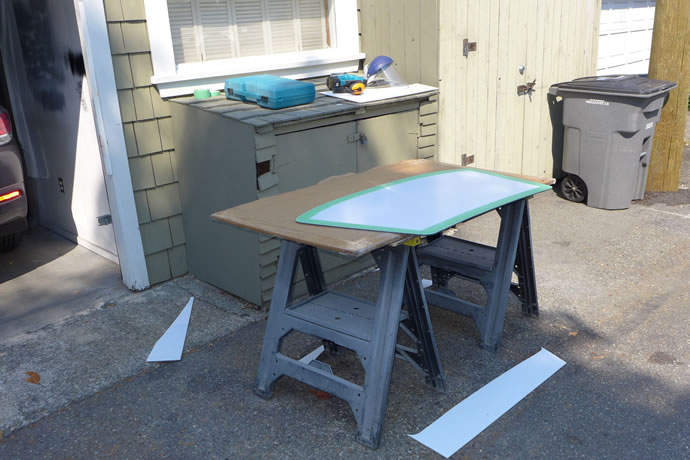
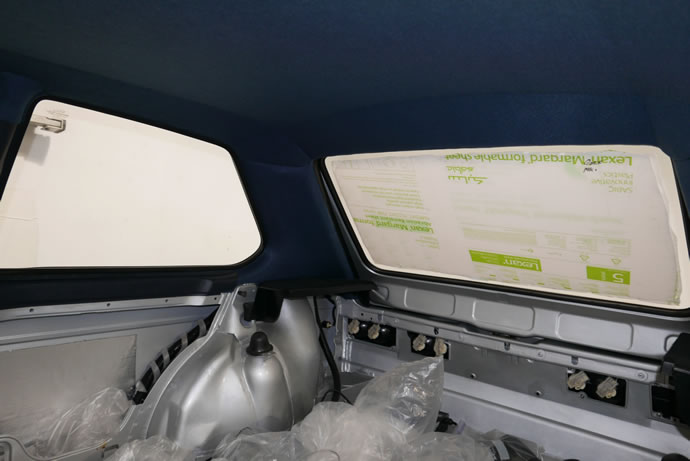
I brought back my new Lexan Margard windows from the UK last week. AWC Motorsports Plastics in Bristol made them and they are perfect with nicely beveled edges (unlike the rough cut Lexan windows that LWS Design in the UK made for me in 2013 - that were made from the wrong material and for a mk2) - March 8, 2015
I got the plastic nitrous injector lines cut, heated/shaped and installed, plus a number of other intake system plumbing jobs like finishing the assembly of the -4AN hose ends for the vacuum lines, plus sorted out a new approach to my oil-to-coolant intercooler mounting which was to machine a block of aluminum to allow the lower oil fitting to stick out sideways rather than straight down (designed but not yet machined), and the big job for the week was the installation of the GTMAT 110 sound damping material on the interior of the chassis (to reduce panel vibration from the engine and exhaust areas) - April 12, 2015
After fighting with the old heater valve cable for about 2 hours (trying to lubricate it so that it would slide smoothly and open/close the heater valve) I gave up and found a replacement Gemo p/n 161819837 on ebay that looks like it will work fine in my mk1 application. I then fitted up the remaining cables that were in perfect working condition and mounted the heater/HVAC box in the chassis with its new gaskets. I was then able to hook up and complete the coolant system lines in the engine bay and pressure test the complete system to 15psi - success! I was also able to install many of the engine sensors and started to design a mounting bracket for the Holley Dominator ECU and ignition coils that will be placed in the rain tray on the passenger side (it is all weather proof but won't really see any water where it will be placed) - April 25, 2015
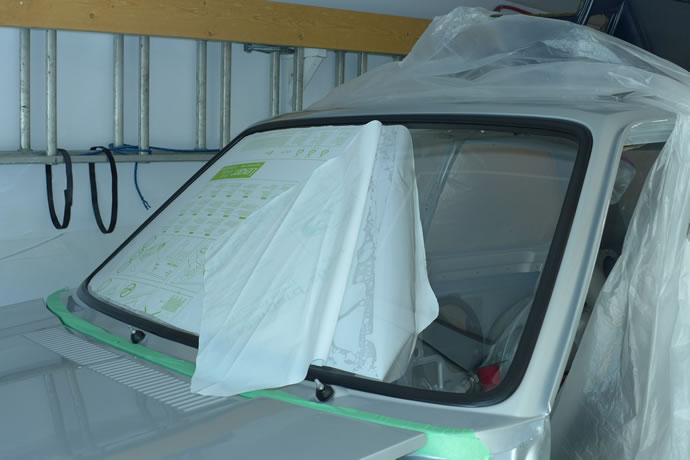
What a heart breaker: After searching endlessly on the internet I finally located NOS VW front windshield glass at VW Parts Place Inc in Michigan ('genuine VW glass' is what they list on their web site) but they would not ship it to me on the west coast - in store pickup only. So I ended up paying them $400 in shipping to get it loaded onto a pallet in a huge box and trucked it out. Buggers! It is Chinese glass and it has a non-stock tint bar across the top which would definitely identify my GTI as a non-stock car (besides the fact that I would hate staring out the window at that tint stripe all day). When I called them they said 'What is the problem? The glass will work fine'. They are a small business and I was the one who pushed them to hard to ship it to me so I will take responsibility for this mistake. So I have now taken the additional step of ordering 3/16" Lexan Margard and will cut it to the same shape and will tint it like all of the other Lexan Margard windows with the super trick 3M CR90 Crystalline film which will give the windows a very OEM look. Who knows if the Margard will stand up to wipers on the surface - I'll have to be very careful not to drive the car in bad weather. I'll keep the chinese glass just in case - May 12, 2015
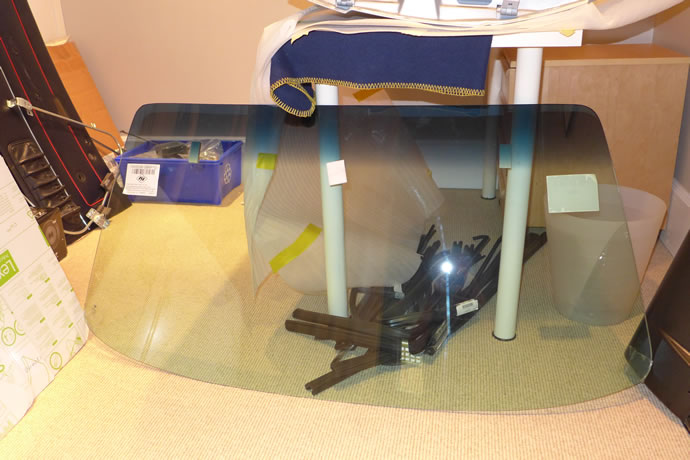
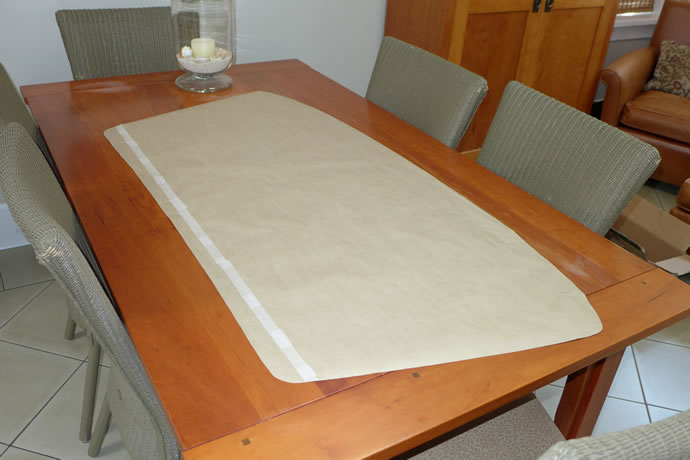
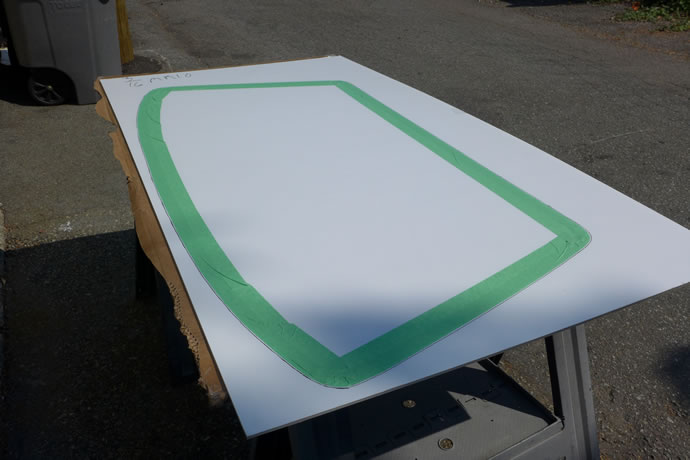
I took the glass windscreen and traced the shape onto paper and then transferred it to a 3/16" (6mm) MR10/Marguard Lexan sheet, then cut it out with a jig saw, profiled the edges with a palm sander, and then sent all 8 windows to the auto glass shop for the application of the 3M CR90 Crystalline film (90% visible light transmission, 50% heat rejection). Note: applying film to Lexan is generally not advisable as Lexan absorbs moisture and therefore can re-release moisture when high levels of heat/sunlight hit it, lifting the film (bubbling). And it is also hard to apply the film as the water required to help position the film sucks into the lexan causing it to grab/set pre-maturely. I found an installer that is very good and is willing to give it a try: we hope that the MR10/Margaurd coating on the Lexan will act as a barrier and will make the film application easier plus will reduce the potential for bubbling. I will also be careful to not get the lexan windows wet and then subject them to strong heat/sunlight ...
Once I get the windows back I can install the front windscreen and then mount the dash permanently (after re-coloring) so I can then complete the dash wiring, etc. I started the process of re-coloring the interior plastic parts by attacking the center console over the last 3 days: the console that came with my car was crudely hacked up by the previous owner so I found another console and set about filling and sanding out the imperfections. I started with a good cleaning, then application of 3M plastic filler, then 220/320/400/600 grit dry sanding, then 600/1000/1500 grit wet sanding. I am ready to re-color it tomorrow. I also ordered the correct BA7 and BA9 instrumentation LED bulbs for the gauges - August 16, 2015
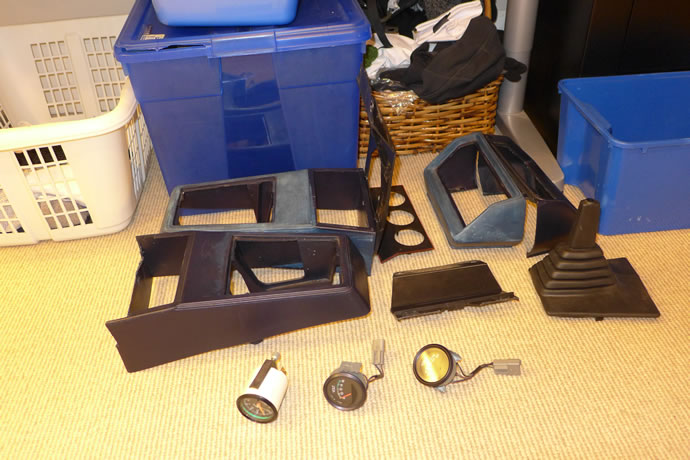
I gathered up all of my various interior components to compare colors and decided that my initial decision to match the back of the seat vinyl color with the Parasol Varibond re-coloring solution was the best option: it is a bit less 'blue' and a bit more 'grey' than some of the plastic console and door card components but it matches the seat fabric perfectly, plus the carpet and I think it is overall a more pleasing color than the 'in your face' blue of some of the other parts (VW wasn't very fussy about matching colors back in the day - it seems that every component had a slightly different color balance to it and so I have to make a judgement call). I have done 2 coats of painting/sanding of the center console and it is starting to come together - one more process of sanding/painting should do it and then I will start to get a production run going for all of the other interior components including the new deck lid carpet which is currently black.
I am also starting to work up a 'for show only' dummy VW GTI dash gauge cluster to place in front of my Holley Digital Dash when the car is parked or being shown - the idea is to have a thin panel that can be placed in front of the digital dash or removed at will ... - August 18, 2015
The 3M window film jobber said 'no way' after attempting to apply the CR90 film to the MR10 Lexan windows (grabs too fast) so I mounted the front window without film and found that it curves to shape nicely and looks fantastic (optic quality is superb). I was a bit concerned that 6mm (3/16") Lexan would not conform to the window frame shape as it is fairly stiff. I am using 4mm for the other windows.
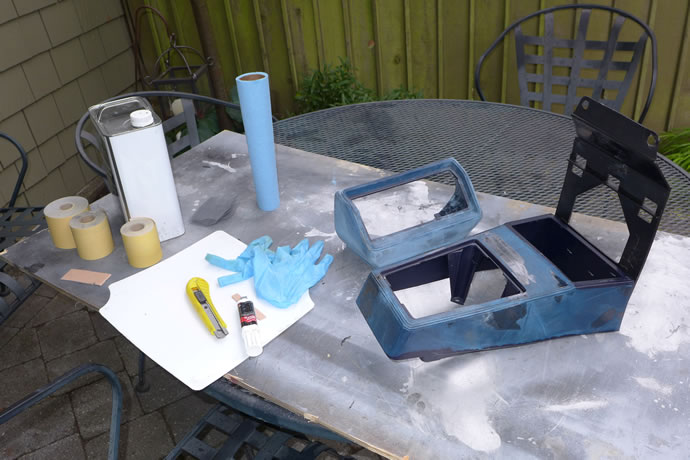
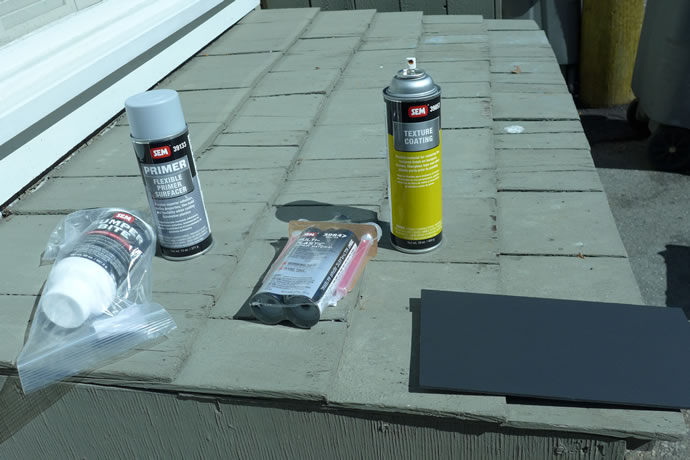
I received my plastic repair kit items from SEM that includes a 2 part plastic filler, a 2 part plastic glazing compound, a flexible sandable high build primer, and a texture coating and went to work refinishing the center console and back seat side panels which needed sanding and re-texturing. Once that work was complete and I was happy with the results I also prepared a few other interior parts and sprayed the final color coats all at once (yes I am really happy with the results). I am now ready to tackle the bigger task of re-coloring the front door cards and dash.
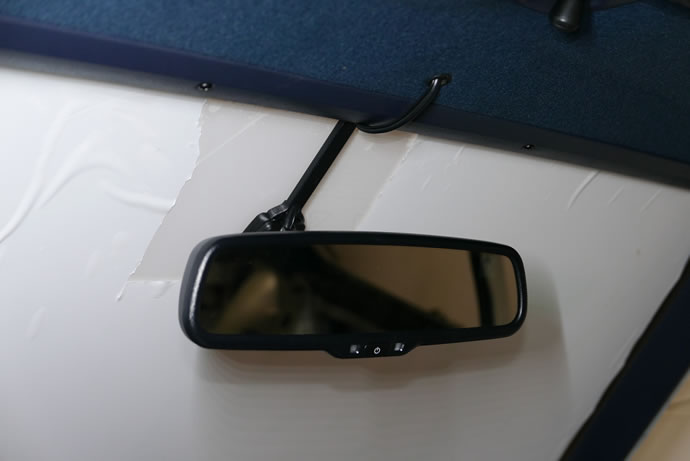
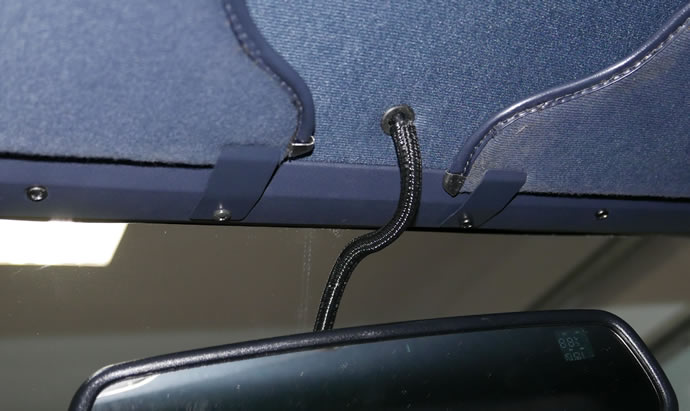
I also ordered a Boyo VTM43TCA auto dimming rear view mirror that has a number of advanced features: an integrated backup camera monitor; a wireless grill mounted temperature sensor and a compass, plus hidden touch screen programming features. It is 2" wider and a bit taller than the OEM mirror so I will have to reshape the visors when I re-cover them along with the installation of the new headliner. For safety reasons I like backup cameras - both to protect the car from hidden objects and to avoid driving into things in my garage that are often on the floor.
Finally, I am designing a panel of switches and potentiometers to be hidden inside the ash tray: ignition 'on' switch, start switch, engine kill switch, nitrous enable switch, nitrous purge switch, A/C on switch, A/C temperature pot, and 2 seat heater pots. All of the mini rocker switches have different color LEDs embedded in them so it should look nice and trick when the ash tray is flipped open ... - September 10, 2015
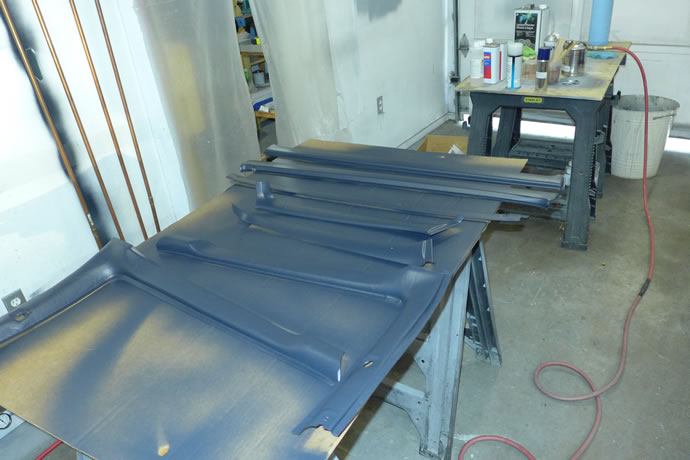
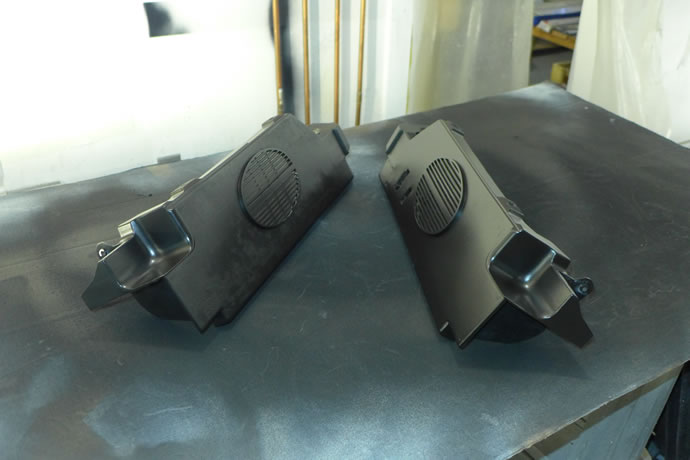
The console and rear side panels after sanding/repairs and the application of the black texture coating ...
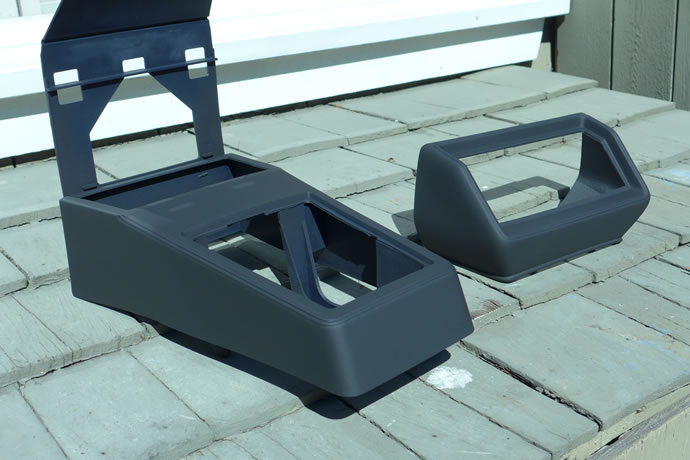
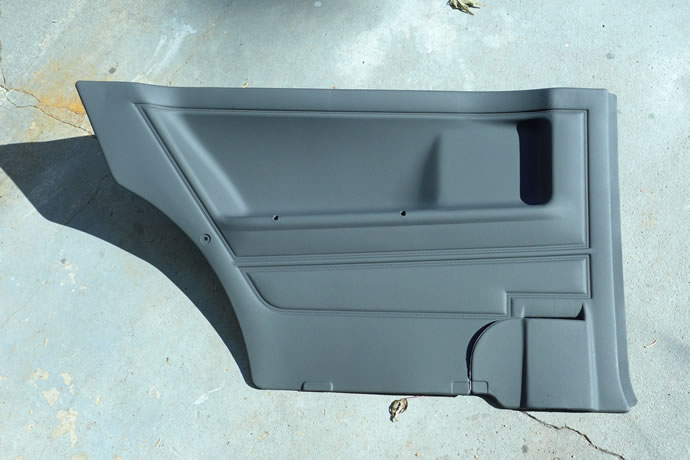
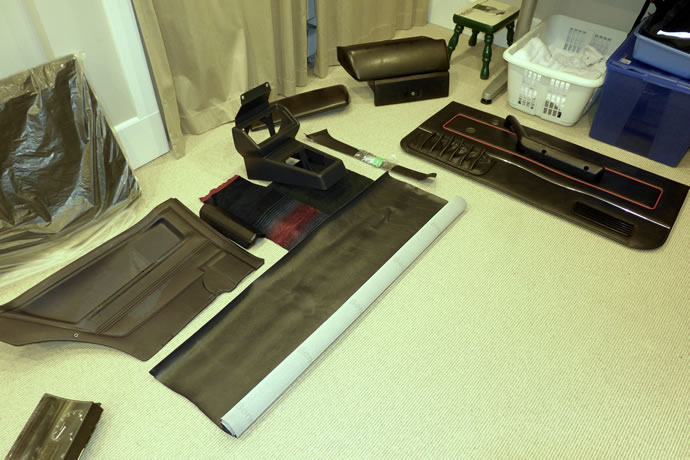
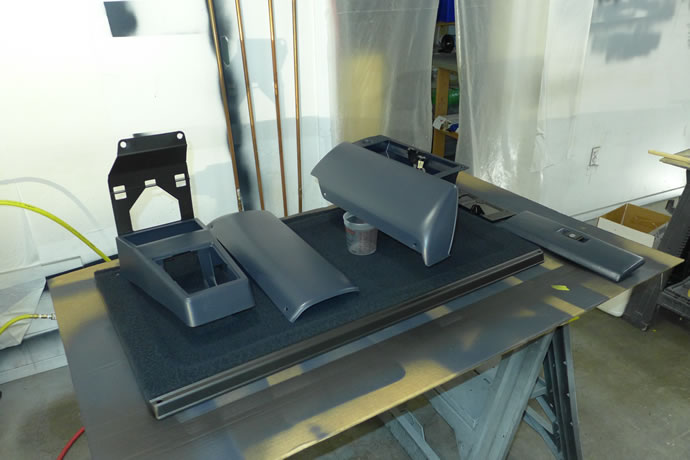
A number of interior components after final color application ...

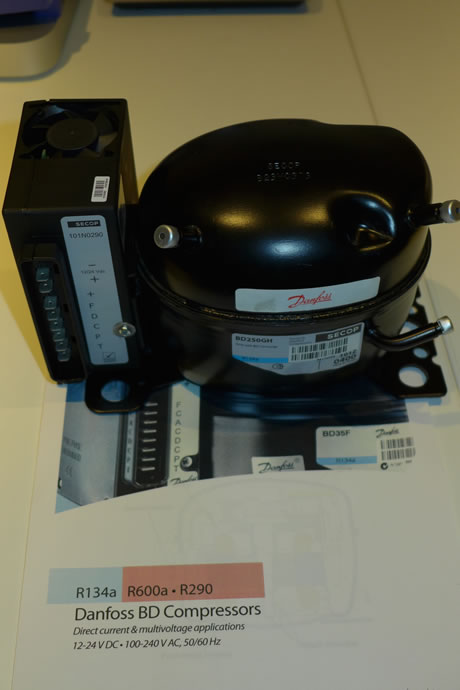
The effort to repair, re-texture and re-color all of the various plastic parts (midnight blue and black) continued with vengeance over the past 10 days, with the biggest successes being the completion of the major dash components. I also got deep into the effort to restore the fender flares which need a lot of work. Finally I also received the Danfoss 400W 12V A/C compressor (which translates into 1500BTUs which is only a small fraction of what a crank driven A/C compressor is capable of putting out but should be sufficient for my needs) and I also started to order a few of the other components that will be necessary to complete the whole A/C system - September 20, 2015
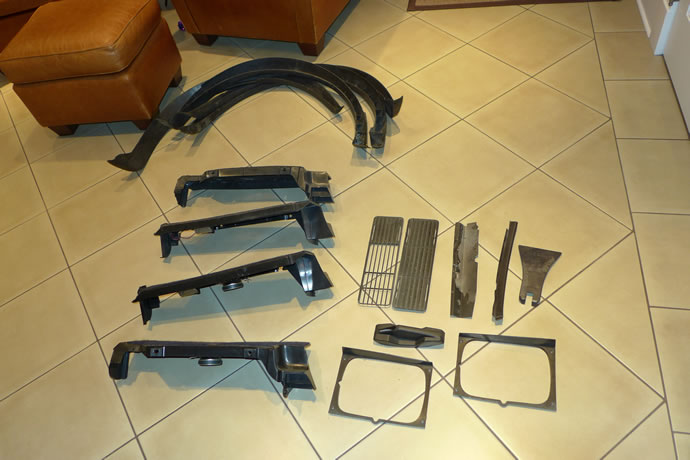
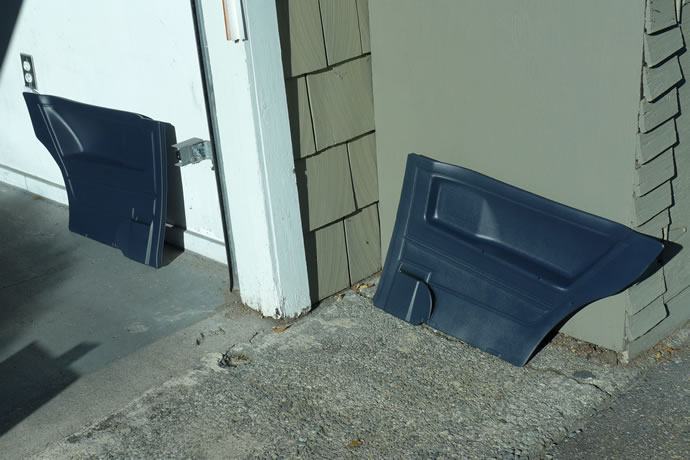
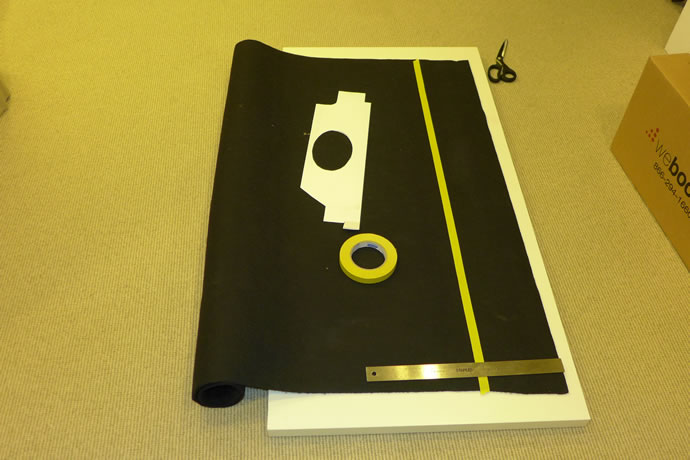
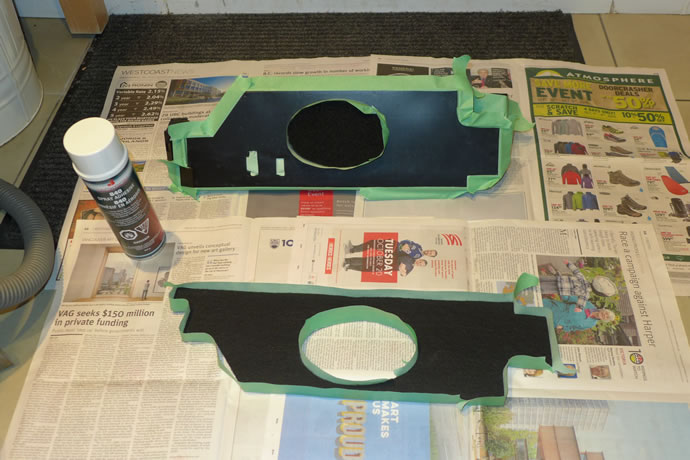
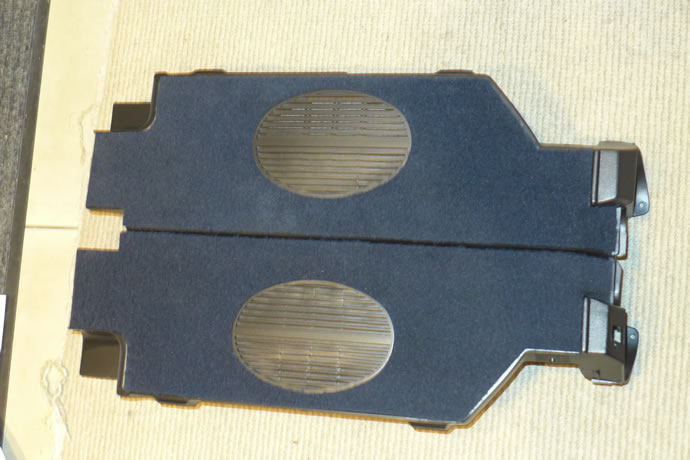
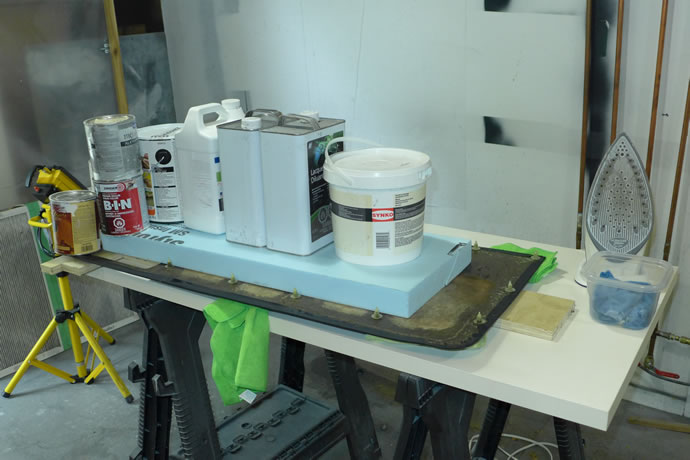
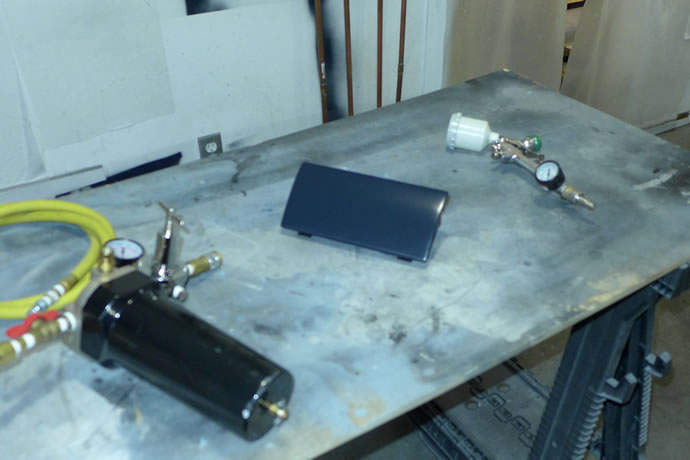
I had 2 sets of the rear hatch side shelves - neither set was perfect, each with their cracks and other damage from 3 decades of hard use, so I chose the 2 best examples and started the process of removing the old carpet, gluing in extra supporting plastic material underneath to re-enforce the units, and then used a heat gun to soften the plastic and bend each unit carefully back into correct shape (they warp over the years). Then the process of prepping, filling, sanding and painting using a combination of the SEM plastic repair products (see a description from the bodywork web page for the fender liners/flares), and finally the careful process of measuring & creating a template for the carpet, and then cutting out the carpet, painting it midnight blue, and then gluing it together (after again masking off the non-glue areas). It all worked out nicely in the end but took a lot more time and effort than I had anticipated - September 30, 2015
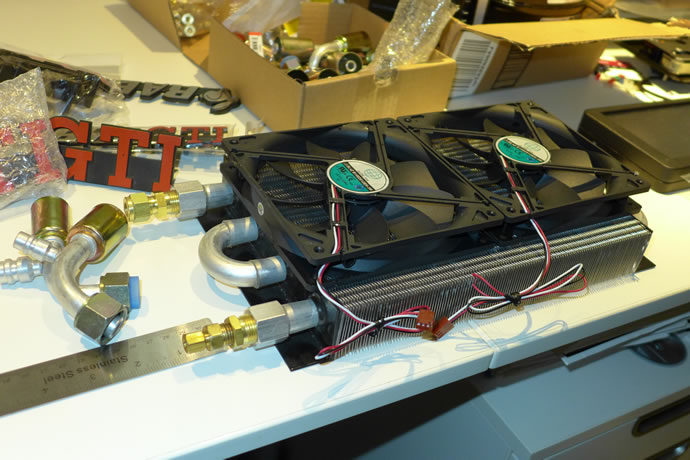
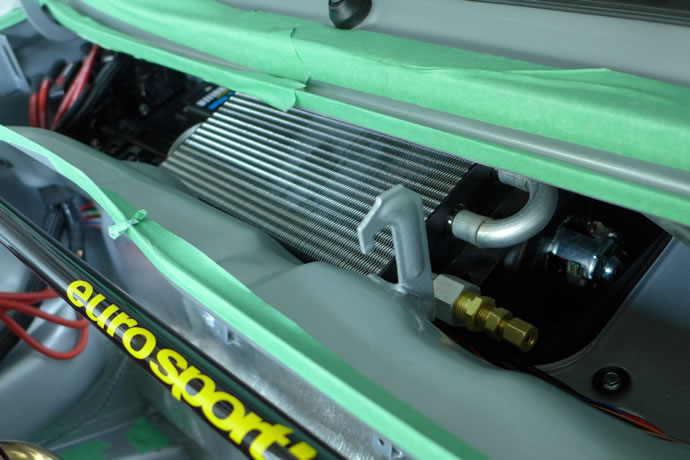
I have made more progress designing and building the 12V air conditioning system using 2 Perma-cool 1.5x7x14" oil coolers, 2 12V waterproof fans, and a bunch of custom fittings.
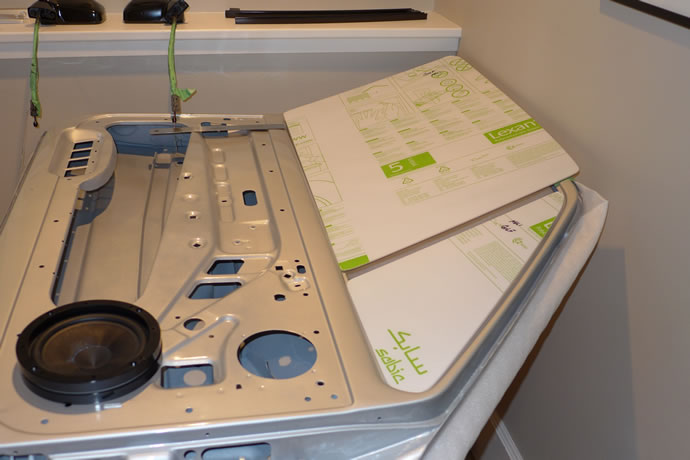
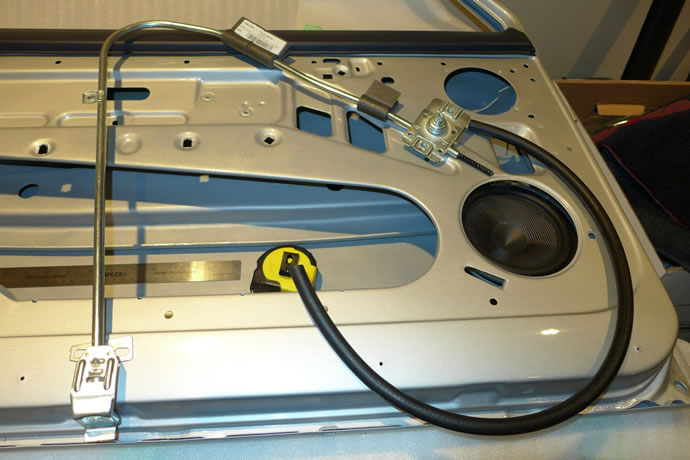
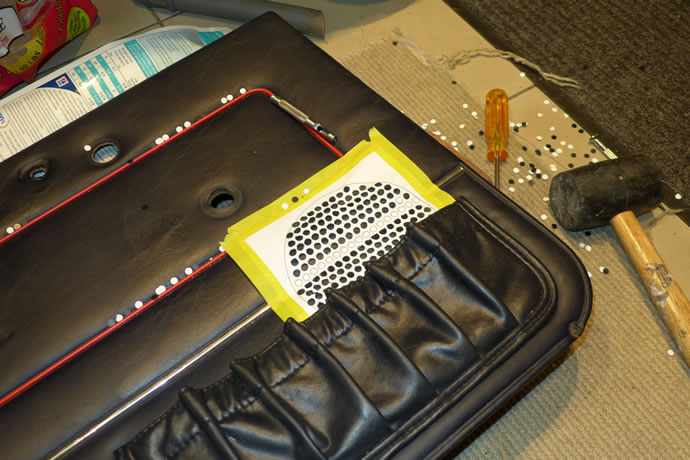
I also put a lot of time into sorting out the mounting of the 6.5" Hertz woofers into the door frames and figuring out how to modify the window regulators to avoid an interference, plus got well underway with the hole punching process to create 'grills' in the door cards - plus I solved a problem with old warped particle board support by wetting/steaming/pressing/drying the door cards ... - October 9, 2015
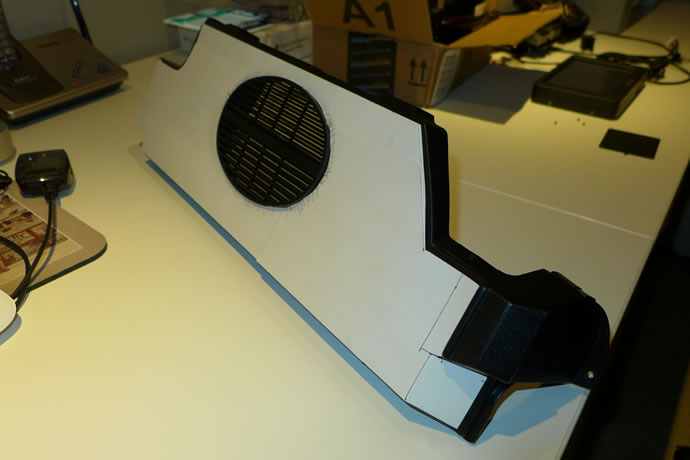
I completed the fabrication and installation of the A/C vents in the center of the dash, fabricated the mounts and modified the dash plastic to allow for the Holley digital dash unit, did the re-wiring to install the Lithium battery current monitor and alternator voltage regulation in ECU command, dismantled the car rotisserie, purchased and setup the EZcarlift, took the car out for its first drive down the lane and in the process damaged both the Wilwood brake callipers and VW Snowflake wheels, repaired all of the damage, did a 4 corner weighing of the car (1540lbs, 70/30 weight distribution) and calculated the approx final weight and distribution: 1800lbs and 66/34 distribution). A lot of progress - my back and hands are worn out and need a rest! - November 28, 2015
I got started on the ash tray which required sanding and filling, then texturing and painting before I can fabricate an aluminum panel for the inside of it to mount 6 rocker switches (Ignition on, engine start, engine kill, A/C on, NO2 enable, NO2 purge) and 5 potentiometers (A/C level, Seat Heater 1/2, Brake Servo Vac, blower speed) - February 17, 2016
I put weatherpack connectors on the seat heaters, sorted out all of the h/w and plastic bits needed t put the seats together (and ordered a few missing parts) - May 20, 2016
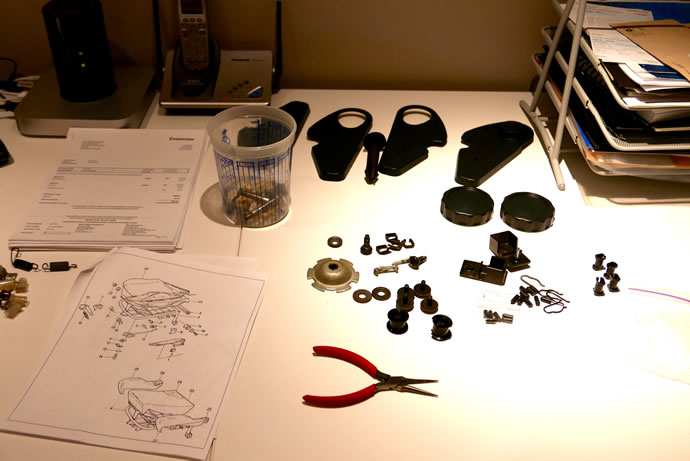
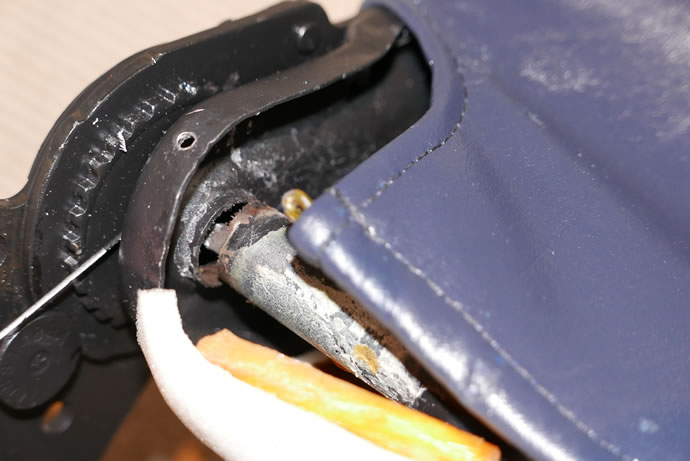
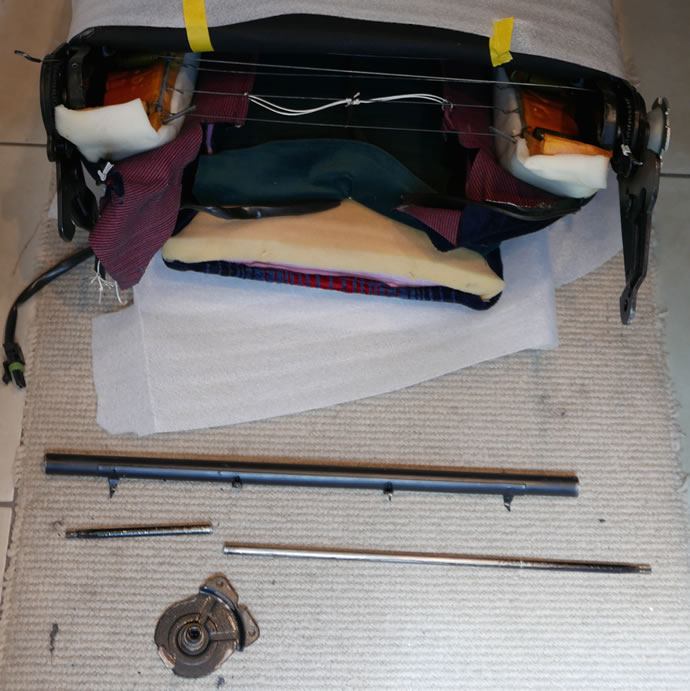
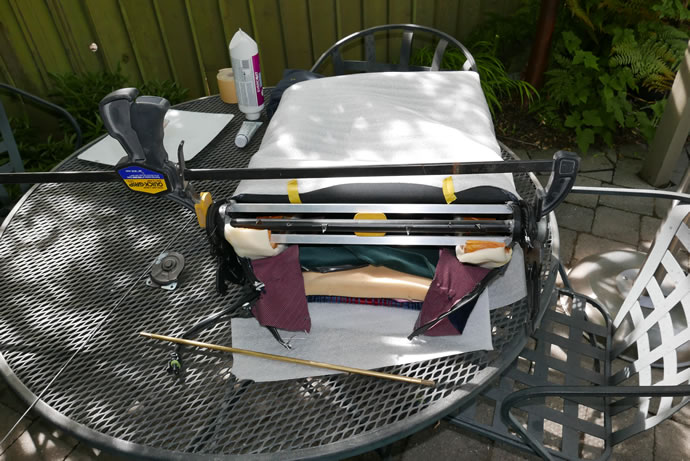
While I was attempting to put the seats together I found out that the recline mechanism on the driver seat was jammed for some reason and it turned out that the upholstery guy (who shall remain unnamed) ruined the mechanism by drilling holes and installing sheet metal screws into the cross tube and shaft inside it - the shaft was jammed/damaged and needed to be replaced. And it turned out after stripping the seats down to see what was going on that the welds from the tube ends to the side frames were broken as well. It was a big job to design and fabricate a full repair but in the end the seat is stronger and straighter than ever and I am very happy with the final result now - June 7, 2016
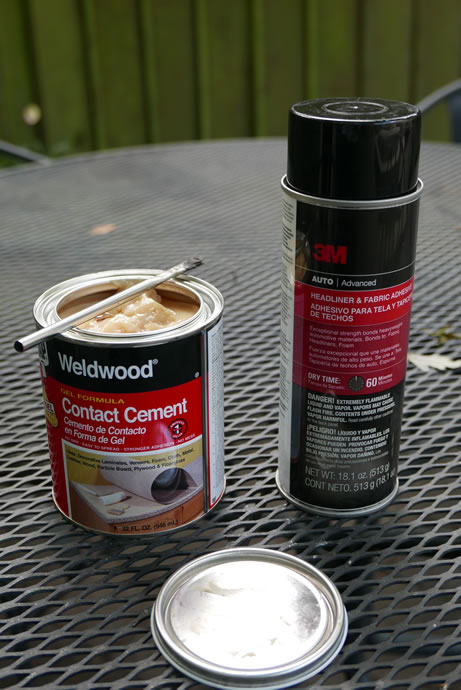
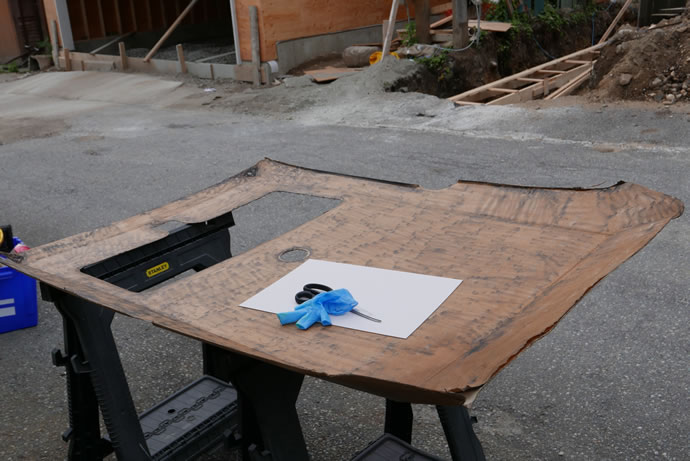
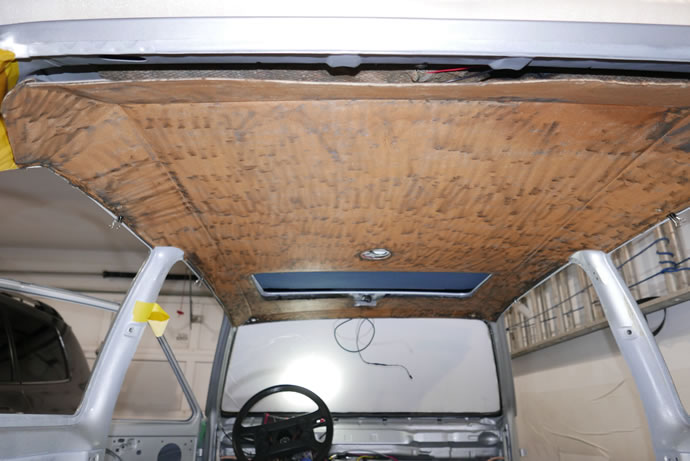
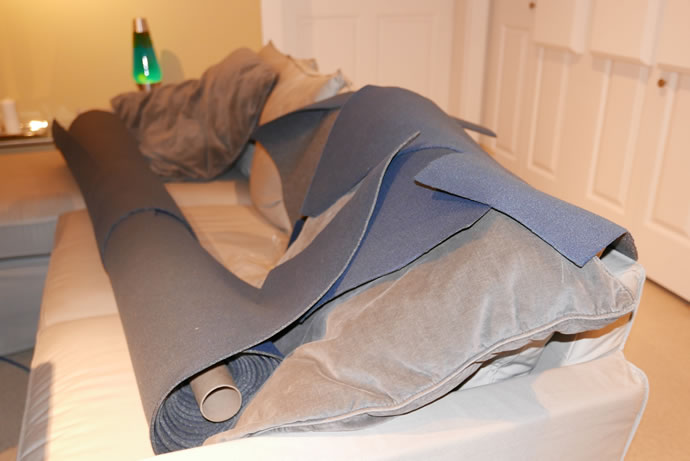
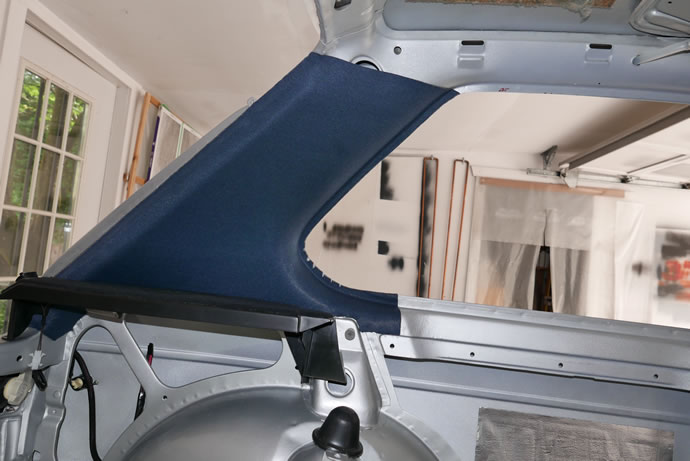
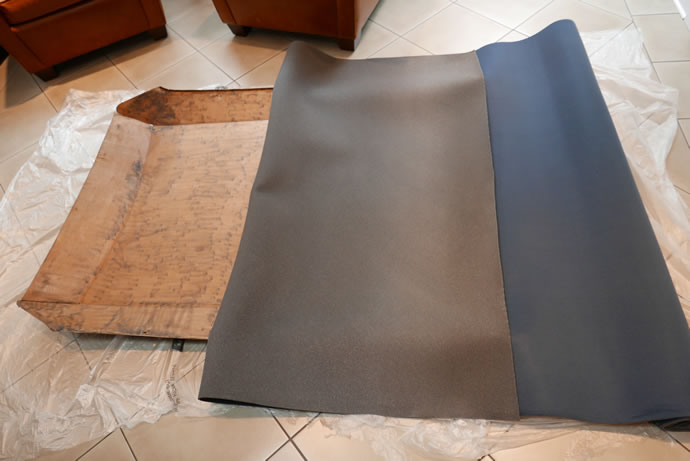
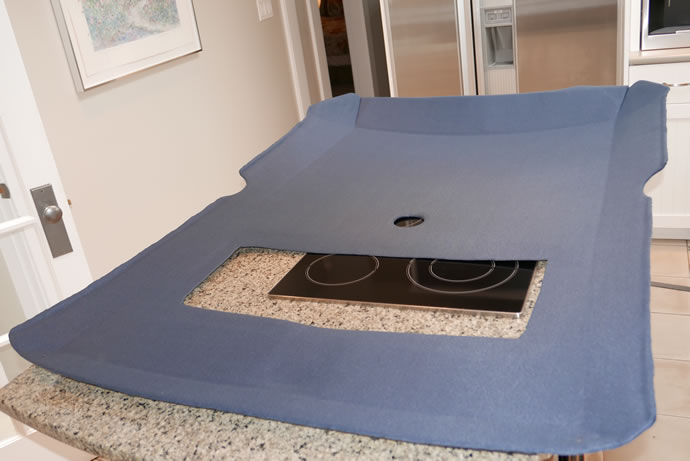
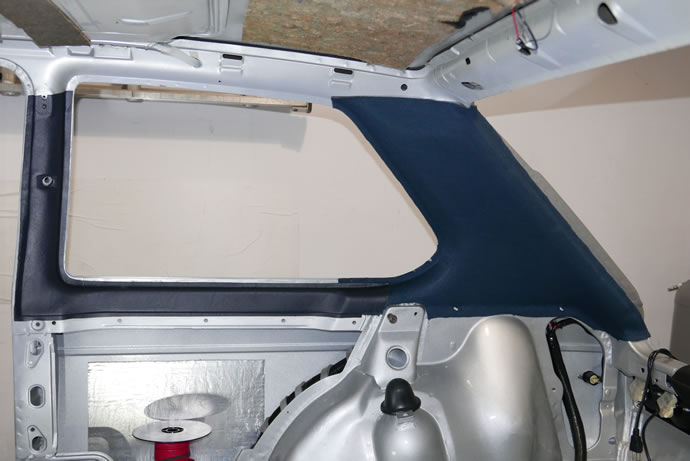
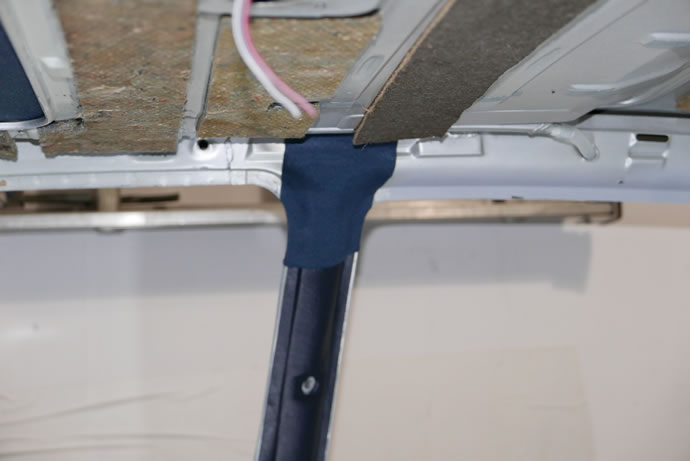
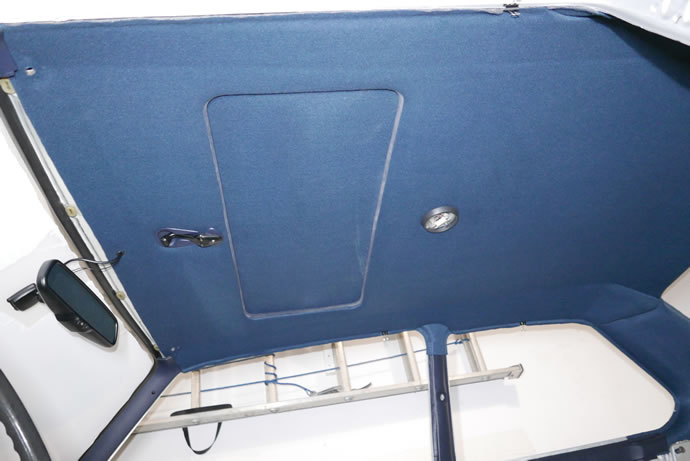
Headliner - Wow! This was a much more involved task than I had envisioned. 2 weeks of thrashing and it is finally complete. One of the challenges is getting the foam backed headliner material (from SMS Automotive Fabrics) to be cemented flat, straight, etc. over such a large area, another is all of the sunroof interface issues, and in my particular situation the metal bosses that the sunroof mechanism screws into are lose and require vice-grips to hold from the under side when attaching the mechanism from the top so there is no way to put the sunroof in AFTER the headliner is in, so I had gymnastics getting the headliner flowing correctly into the sunroof opening and then attaching the trim - the video explains it all. In the end it is 100% to my satisfaction - it just took about 20 hours longer than I had budgeted ... The dash is going in starting this weekend ... (I am on a roll now). - June 24, 2016
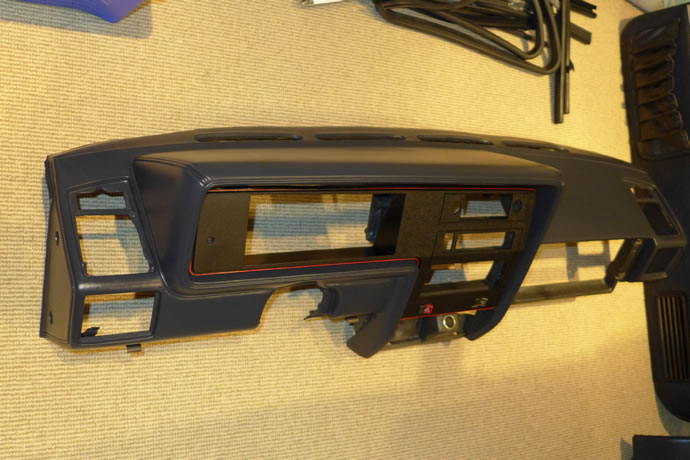
The dash is 'in' - minus the speaker wiring and final lower console assembly which will have to wait until the doors and carpet is in - everything fits well and works correctly and I get decent airflow thru my 'custom' centre air vents which is great. I have a small amp remote control dial placed below the ash tray that allows me to quickly adjust things like subwoofer volume and it 'just' fits and looks subtle enough. I now have to rebuild my paint booth this weekend and re-base/clear the front fenders (one of them had a small rust bubble and they both needed more clear coats for final wet sanding), and re-clearing the doors (again, I am not happy with the slight waviness from prior wet sanding so want to get them dead flat), plus I damaged the rear lower valence near the muffler by lowering the car onto my heater which needs fixing ... then I can get the doors assembled and mounted and all of the glass into the car, etc. - June 29, 2016

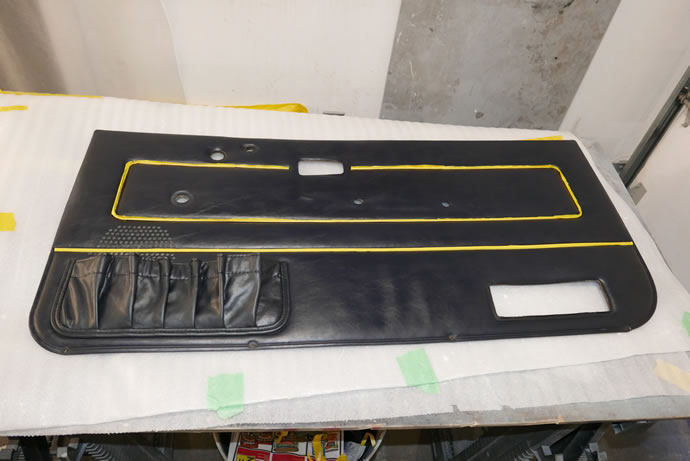
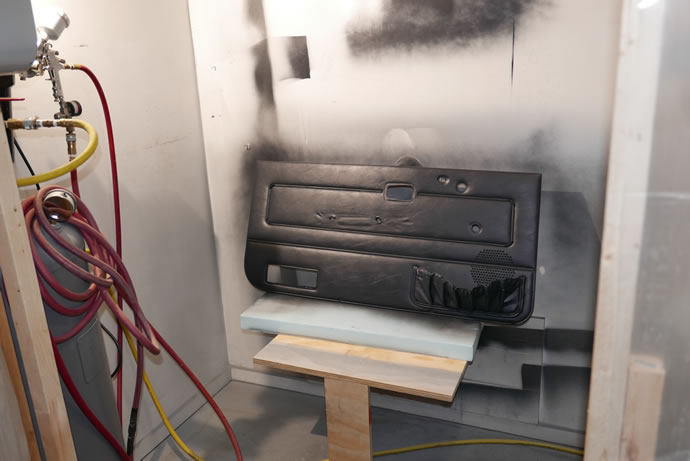
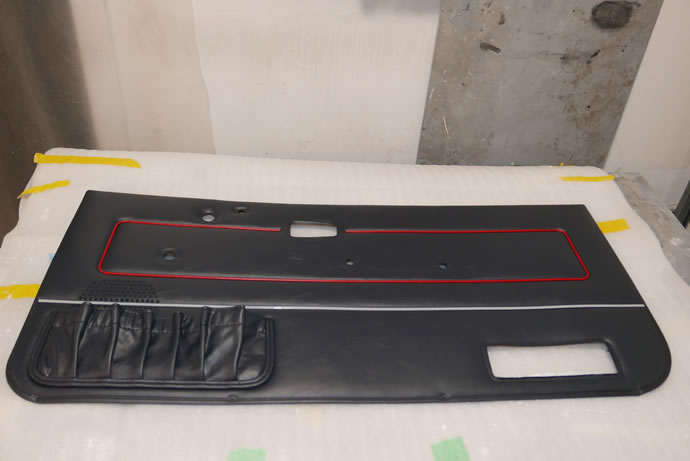
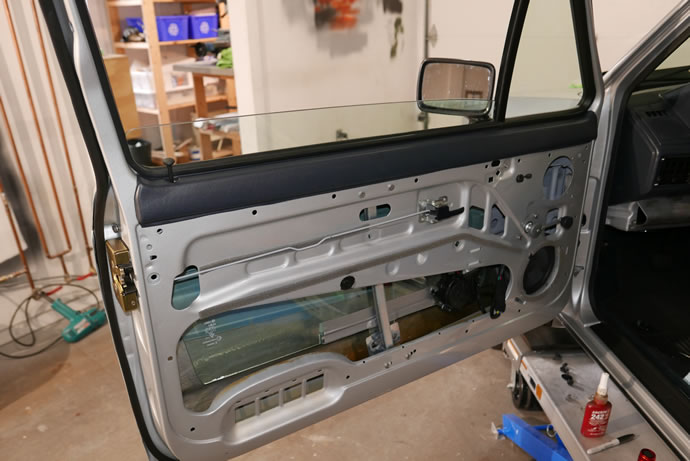
While I had the temporary paint booth setup in the garage for the doors and fenders I took advantage of the setup and used it to apply Parasol Varikote vinyl dye to the door cards after masking off the chrome and red striping. Once the doors are polished I can then assemble them ... - July 4, 2016
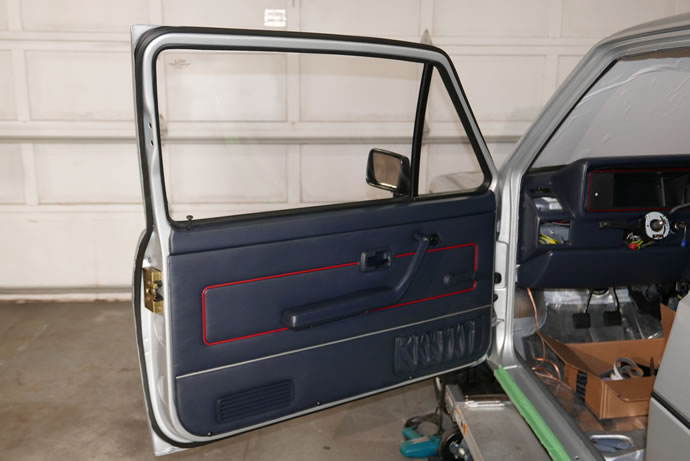
After holidays and such I have managed to get the project somewhat back on the fast track. This last week I finished the carbon/foam/aluminum bumpers, installed all of the lexan panels, mounted and adjusted the gap on the rear hatch/tailgate, mounted the door handles, re-keyed the lock cylinders, rebuilt, painted and mounted the mirrors, and started on the rest of the door assembly work. T minus 40-50 hours max now before licensing it ... - August 10, 2016

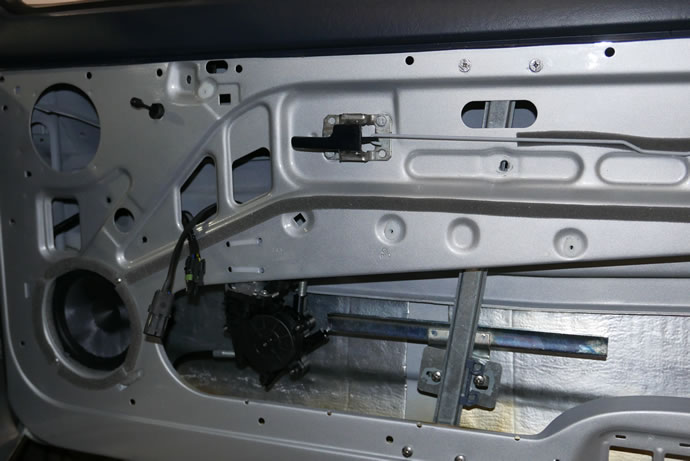
The last 2 weeks were an intense period of battling to put the doors together with the lexan windows and non-OEM windows lifter mechanism, seals, locks, speakers, etc. In the end there was a conflict between the speakers and the lifter mechanism that has caused me to reconsider the design and move towards a mk2 electric lifter mechanism using the hand crank arm as a momentary up/down switch - the video explains why. I am also going to get a local plastics firm to heat bend some Margard lexan to the correct curved shape as the flat lexan sheets don't take the proper shape and are hard to move in the channels. For now the driver window works but the passenger window is fixed - I have the option of simply putting in the OEM glass and the OEM lifter mechanism but I'll try the above approach. The doors look great overall and the sub-woofer ended up working out really well. The latch for the carbon fiber hood had to be re-worked a bit and is now functioning properly. I am T minus 1 week to project completion now ... - August 22, 2016
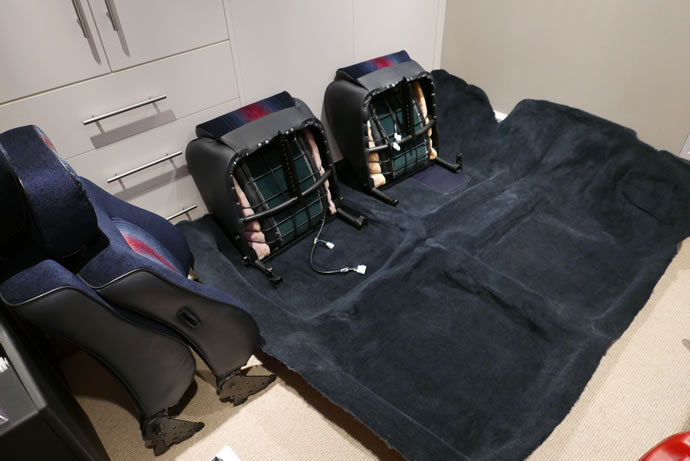
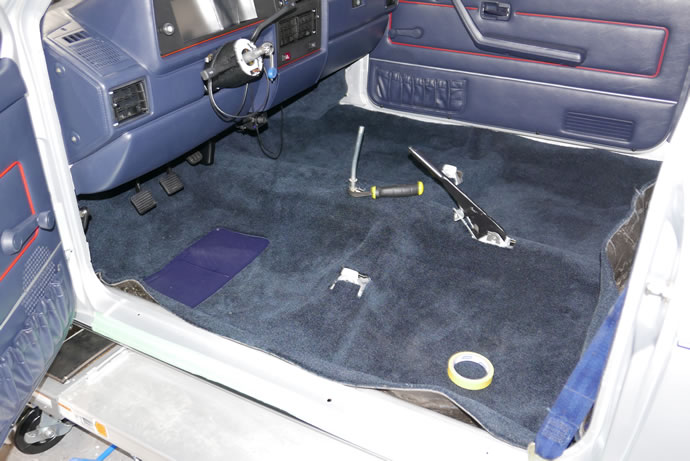
The dash final installation went well but the plastic bits rub and squeak against each other when driving on bumpy roads so I will have to start to place some felt tape around various places to get it to quieten down. The carpet is from factoryinteriors.com and is 'mass-backed' meaning that it is a heavier and stiffer carpet than stock and is a pain in the ass to cut and get moulded to the body shape - it took the addition of some stiff foam under the carpet in the front to work out. Now it all looks great. The seats went in place nicely. The new foam and leather wrapped wheel worked out too - September 1, 2016
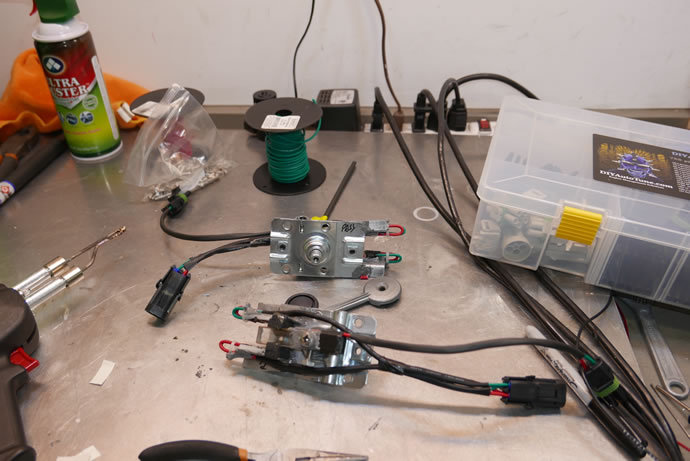
Yes, the VW mk2 electric window mechanisms can be successfully adapted to the mk1 - I just did it. You will need p/n VW: 191837402C or 191837462A for the right side, and p/n VW: 191837401C or 191837461A for the left side and I recommend sourcing the mk2 lift channels as well ( p/n VW 867898571) but I did not want to wait so modified the mk1 channels to work - September 22, 2016
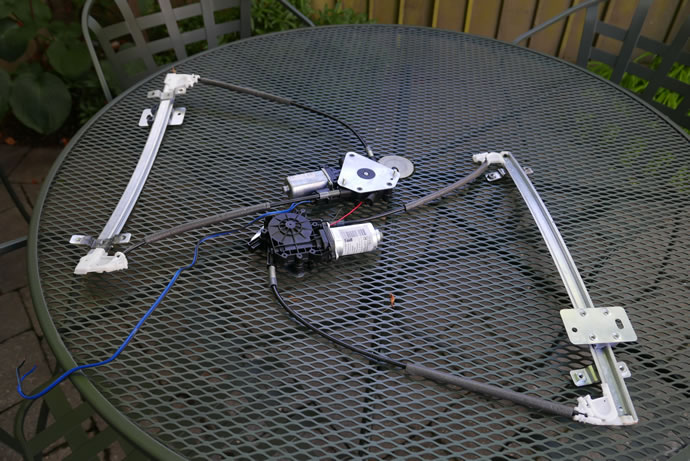
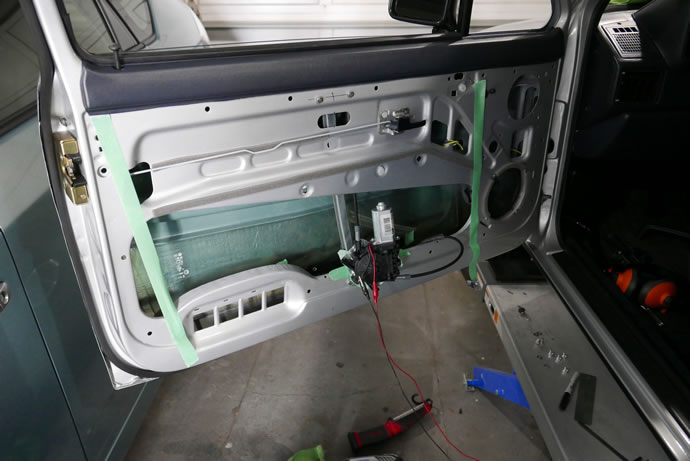
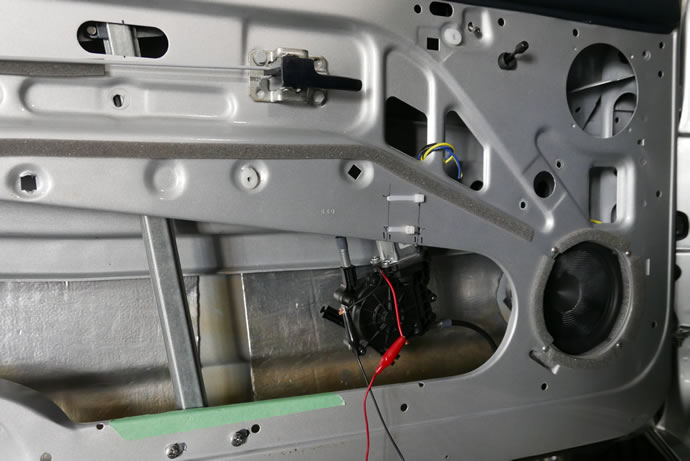
I completed the installation of all of the glass, including the VW mk2 electric window mechanisms and the mk2 lift channels as well, plus I made up some trick custom bi-directional window lift switches that use the old crank arm - October 30, 2016
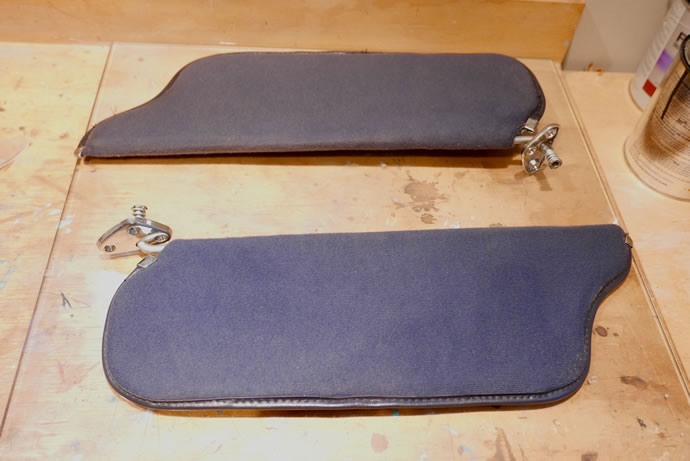
My old visors were rusty and dirty so I found another pair on the internet and worked to clean them up with some dry cleaning fluid and then repainted the trim and now they are ready to be mounted. I then made some metal retaining clips for the visors to keep them from flopping around - November 20, 2016
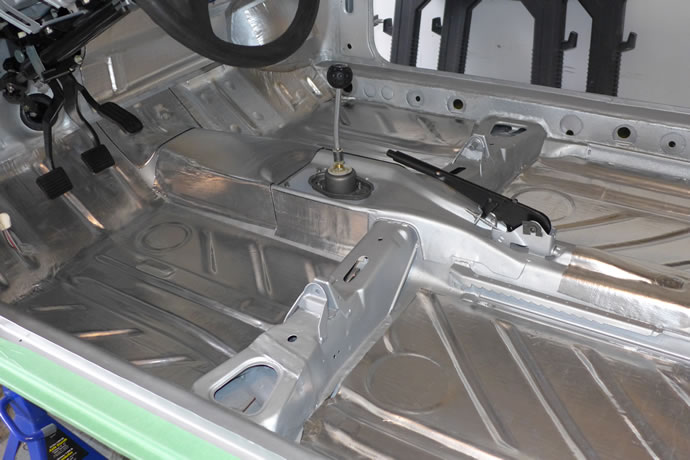
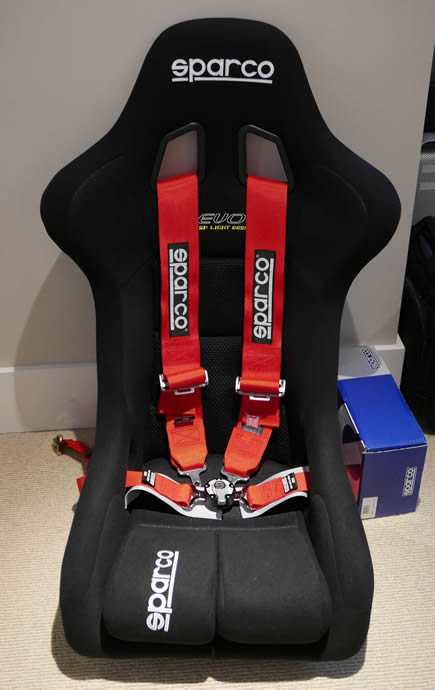
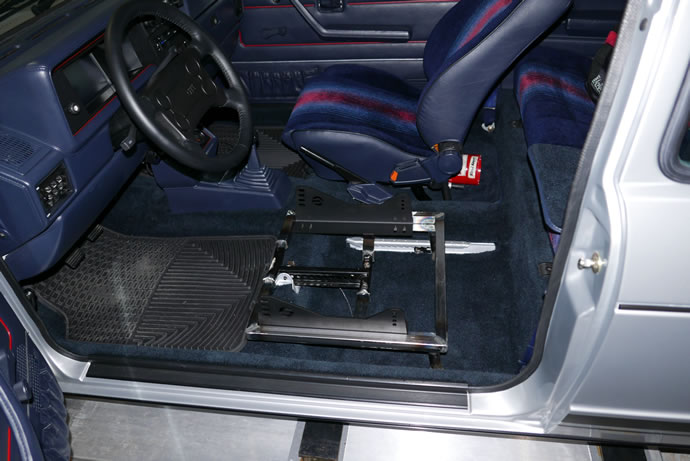
I made the decision to be safe on the race track with Italian Sparco racing seats that will hold me securely in place for improved driving accuracy, equipped with 5 point harnesses to keep me safe if something bad happens (note, I am going to attempt to use a Simpson single anti-submarine lower belt rather than the dual belt Sparco design as I think they are cross-compatible with both cam-lock systems). I received my new racing Sparco EVO seats which are really nice and started the process of cutting up some OEM seat bases to use as a foundation for a 1x1" square tube mounting base for the seats - the idea is to have the convenience of the stock mounting locations and fore-aft adjustability. I am also fabricating a cross-tube to mount the shoulder belts to that will attach to the upper and lower frame bosses for the OEM seat belts. I will likely race with just the driver seat installed - no passenger or rear seats for weight reduction purposes (unless I am showing off and having a passenger on the track which will happen from time to time). I am also fabricating a horizontal extension plate for the shifter as it is too far forward to reach comfortably when held in place by a 5 point harness - March 20, 2017
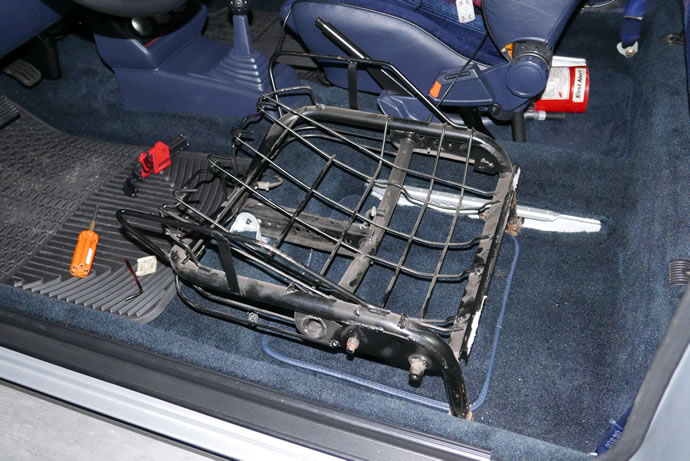
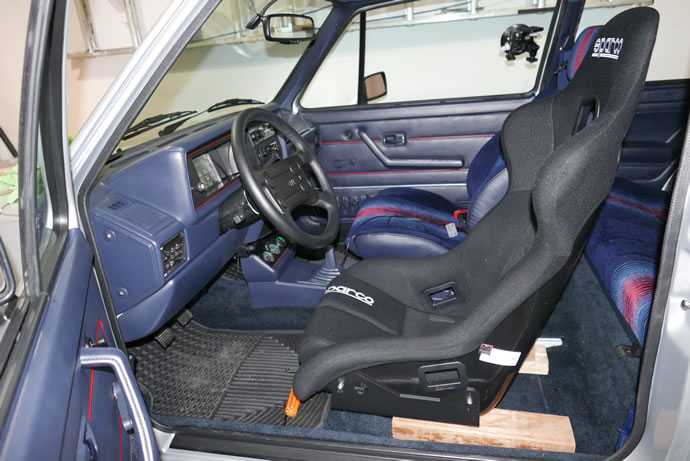
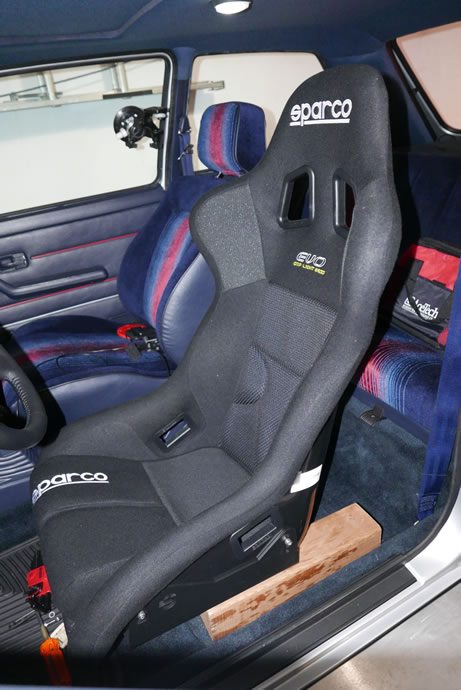
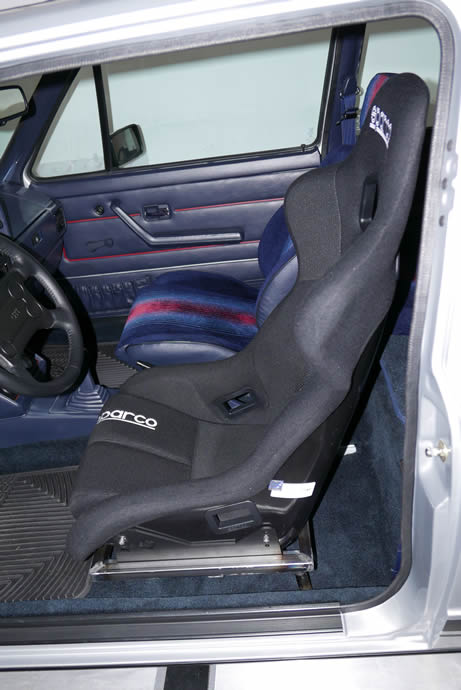
I finished the fabrication of the seat mounts for the new Sparco EVO racing seats using the mounting flanges and legs from a junker set of OEM seats - they worked out very well - a little lower position than the stock seats and full adjustability of fore/aft position using the OEM mechanism and slope using some bolting options with the Sparco mounting flanges. Should be sweet!
I don't have a tube bender so Ted at JetFab in Richmond, BC will be fabricating the bolt-in roll hoop which will use the stock seat belt mounting points to secure it to the body of the car. The hoop will have the cross-bar for the shoulder harness mounting points plus a central camera mount. When it is complete I will send the seats and hoop out for powder coating.
I am also fabricating a rear shock tower cross-brace that also connects into the rear bumper mounts which will be needed as a mounting location for the nitrous and air tanks (the 4500psi air tank pressurizes the nitrous bottle to 925psi and holds it exactly at 925psi using a regulator rather than relying on a heater which doesn't keep the nitrous pressure constant while it discharges). I don't think the brace will actually have much effect on stiffening the chassis further as it is already welded up with a sub-frame, cross-bracing and will soon have the roll-bar ...
I was complaining about the Walbro 393 fuel pump making a nasty noise so I talked with Kinsler Injection which supplied me the whole fuel injection system and most of the engine sensors, wiring harnesses, etc. and they said 'check your 25 micron intake and 10 micron output filters' so I did and found the intake filter completely plugged up with a nasty black sludge which looked like jello! The intake filter is a steel mesh so I cleaned it while I replaced the 10 micron paper filter and also replaced the pump as it had been damaged from the stress of pumping against such a massive restriction. The black sludge could simply be from old gas sitting in the tank for months at a time (if that is true it is actually from bacteria which is always present in fuel, more in ethanol enhanced fuels which also are hydroscopic and suck up water). There is also the possibility that my dumb attempts to seal-up my old fuel tank level sender with silicon sealant (since replaced with a new sender and o-ring) may have caused this as the silicon dissolved in the fuel. Anyway, I will keep an eye on this issue and service the fuel system filters more often. Next time I will do this when the tank is almost empty, rather than completely full! It would have been smart to have installed a fuel tank line valve too - I rely on hose-end plugs to service the fuel system.
Finally, I have put 1100kms of mountain driving on the GTI so far with 700kms of that this last week alone - 3 days of driving to Whistler, with 25,000' of total vertical climbing. I switched out the Joe Gibbs break-in oil now for their 10-30W hotrod conventional oil which contains lots of ZDDP zinc to protect my solid lifter cams/tappets which are under extreme pressure from 8,000rpm and high lift racing cams and springs. I will switch again to their 20-50W oil when I get to the track in May. I may eventually switch to their synthetic oil with ZDDP added to it after 5,000kms. When decelerating from 5,000rpm the MAP signal drops to 17MPa which is the equivalent of 25" of mercury vacuum so the rings on the pistons have sealed nicely - April 2, 2017
Index of Project web pages:
Project Overview, Goals & Specs
Project Car Initial Condition
Chassis Development
Bodywork & Paint
Suspension, Steering & Braking Systems
Engine, Oiling, Cooling, Transmission & Exhaust Systems
Electrical, A/C & Fuel Systems
Interior
Performance Validation
Final Street Trim Conversion
VW Vortex thread on this project
Videos # 001 - 049 (Feb 2013 - May 2014)
Videos # 050 - 099 (Jul 2014 - Sept 2015)
Videos # 100 - 149 (Sept 2015 - May 2017)
Videos # 150 - 181 (May 2017 - Dec 2019)
My original 1983 Rabbit GTI (owned 1983-1987)