
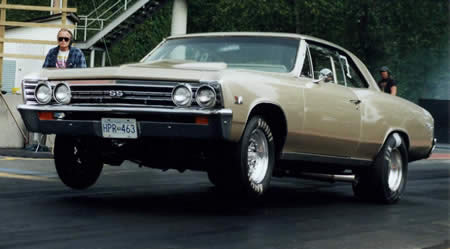
1967 Chevy Chevelle SS396 Street/Strip Car (owned 1996-2001)
Pushing the limits of what can be called 'a street car'
Click here for a complete historical project overview of this car
Click here for the project photo album of this car
Click here for videos of this car
Diary of My Racing and Vehicle Development
Friday, April 9th, 1999 at Mission Raceway
Track Conditions: Terrible, Very cold (4 degrees C), wet (on - off rain/hail), beginning of the season - no fresh rubber/VHT
Best Timeslip: 10.531 @ 127.82 (1.503 60') on the motor only
Constructive Observations: This car is QUIET (well, on the street it sure seems loud but at the strip it is super low key). But it moves out and makes a great sound blasting down the strip - it pulls hard and runs strong. Compared to all of the other cars out there, this car seemed relaxed and low stress. All in all, we got good performance numbers for the track conditions as well as considering that this is the very first time out for a totally new car.
What didn't go wrong: The cooling system really works well. Oil, water and Trans temps were all low at all times. The external oiling system worked well - the idle oil pressure was only 30psi but at RPM it was 60-70psi. The fuel system worked well. The suspension worked well. We were worried about the front end alignment (the suspension toes out under hard braking for some reason) but the car didn't misbehave at the top end of the track. Nothing broke. We could easily have driven this car to and from the track - next week we might actually do this!
What did go wrong:
Problem # 1: Aside from the track conditions, we quickly lost mph on successive runs. The motor was bogging at high RPM and at the top end of the track. First we chased down an apparent lean condition by jetting the carb richer (wrong), then we backed off the timing because we thought it was too advanced (wrong), then we saw the battery voltage way down to 11.5V and we were on to something - the alternator was dead and so was the battery. This significantly reduced the high RPM capability of the MSD 7AL3 ignition module and coil. Back at the garage we also discovered that the ignition wire for cylinder #4 was defective and that a consistent arcing between the wire and the exhaust header was occurring. And a racing veteran said we were using the wrong type of spark plugs. Solution - new alternator, plugs, new ignition wire, and a Jacobs AccuVolt system to feed 16V continuously to the MSD unit.
Problem #2: We didn't have playback capability on the Tach so we couldn't see a lot of things relating to shift points, engine performance, etc. Solution - new tach.
Problem #3: No trans brake! The 10" converter wouldn't load up to the correct stall without pushing the car through the lights during staging. Couldn't launch nearly hard enough - when traction is better, this would really hurt the ET capability of the car. Solution - trans brake and mods to the TH400 trany.
Problem #4: Some quick testing with the Nitrous showed little or no flow and this was eventually traced back at the garage to a restrictive electronic bottle shutoff valve and the lack of a positive mounting angle on the bottle. Solution - new bottle brackets and the elimination of the redundant bottle valve.
Looking Forward: We're going back to the track in a week with all of the above things fixed. What'll she do then? Our computer simulation software says that at 3650 lbs (with driver, 10 gallons of fuel, and a full Nitrous bottle), 128mph = 650hp with an ideal ET of 10.35. The motor should be good for 700hp (all things perfect), and this alone would add 3-4mph (given perfect jetting, solid ignition system, good air, etc.). Adding some traction and a trans brake could eventually (with practice and much tuning) push the ET down to 10.20 or better without Nitrous. The Nitrous system will make BIG power and top end MPH but will the car hook with 10.5" tires? If it actually does, the software says the car will run 8s. That would be very cool and is the ultimate goal for this car.
Finally, it actually might get through "AirCare" with a bit of carb tuning (it failed first time through by a small amount). That would truly make this a "street car". Stay tuned.
Friday, April 16th, 1999 at Mission Raceway
Track Conditions: Great Weather, (sunny & 20 degrees C), but it was "High School Drag Day" so the track surface was slippery from the street tires being used by the local kids. Rats.
Best Timeslip: 10.057 @ 134.38 (1.516 60') on the bottle with 175hp Nitrous jets, and lifting just before the end of the track to avoid breaking into the 9s (the car is not yet certified to run faster than 10.000). The 1/8 mile for this run was 6.487 @ 110.05. Looking at the non-nitrous passes in comparison to last week they are 1-2mph higher in the 1/4 mile, and 2-3mph higher in the 1/8 mile - and on a much hotter day. From this we can see that the motor is now putting out more power - much closer to the 700hp (designed) vs. the 650hp estimated for the previous week. But there's more in this combination once the other bugs are addressed - see below.
Constructive Observations: OK, the car is still being tested and tuned. Therefore its OK for everything to still be going wrong, right? At least we solved the problem (sort of) of the low voltage to the ignition system and a number of other (see last weeks notes) issues. But we got some new ones and were kept from running much faster because of them.
What did go wrong:
Problem # 1: The motor was still bogging at high RPM and at the top end of the track on the motor. We talked to BG fuel systems tech support from the track and they said the carb was running too lean - after last week we came to the track with 90/83 jets (vs. the baseline setting of 83/86) - but we didn't re-jet because we wanted to play with the Nitrous and the system seemed to be tuned well for it. We also rechecked the valve spring lash settings and also changed the plugs. Finally, we changed the alternator charging wire and moved it temporarily to the front to boost the voltage further to the ignition (we don't yet have the AccuVolt system installed). We're booked in for a chassis dyno tuning session next week to fully sort out the jetting and the nitrous system in more controlled conditions so that we can spend our track time on chassis tuning and driving techniques. We expect that this chassis dyno tuning session will make a BIG difference in the 1/4 mile performance the next time we go back to the track in another 2 weeks time. Additionally, a number of engine builders stated that our valve springs are too small for the roller cam we have. Our springs are at 450lbs open pressure and everyone thinks they should be 650lbs open. It's fully possible that the high end bogging could be related to valve float - the reason why this might disappear under nitrous use is that the higher cylinder pressures would help force the valves closed! We're going to be cautious and change the valve springs to avoid the nasty potential problem of piston to valve contact. Lots of things to take care of over the next few days.
Problem #2: After 2 runs the new trans brake broke! The good news is that when it worked, the stall speed on the converter was 4200rpm. The bad news was that the car still launched poorly. By flashing the converter out of the hole, the launch improved but we still ended up with 60' times that were poorer than the week before. Go figure. So, the solenoid on the trans brake seems dead. Easy to fix.
Problem #3: I must have been on drugs when I decided to put a road race front suspension and brake system on a drag car. Not only is the toe problem dangerous at the top end of the track, but the suspension is heavy and it tends to bind during travel. This serves to keep the front end from rising fully and settling down properly. Getting this car to hook will require lightening the front end (we'll try that fiberglass front bumper we have stashed away and a new drag race suspension and braking system) and other suspension tuning and maybe some ballast in the rear.
Problem #4: The car spins the tires all the way through 3rd gear down the track on the small 175hp Nitrous jets. This is one reason why the car isn't going that much faster on the bottle. It's a bit of a wild ride on the jug! So, with the 10.5" (read "narrow") slicks, this is going to be challenging to get this car to hook up and go deep into the 9s or the top of the 8s - but, if the NMCA super streeters are going 7.80s on 10.5 tires, so can we!
Problem #5: The existing nitrous solenoids are small and they are flaky. We don't like them and need to replace them with larger "Pro" type units. We also need to change from a #4 line to a #6 line to the bottle in the trunk as we're pretty sure that the nitrous isn't flowing properly. As we move to larger and larger jets, we're going to start having real problems with this setup if this doesn't get addressed.
Looking Forward: Fix the trans brake. Replace the valve springs. Fix the oil leaks. Tune the carb and nitrous on the chassis dyno. Get the Accuvolt installed for the ignition system. Change over the front brake and suspension system to a light weight drag race setup. Install the fiberglass front bumper. Add ballast to the rear bumper. Change the nitrous solenoids and the bottle line. Add a proper cowl air intake system with high flow filtration - the idea here is to pull in cool, fresh air from the area around the front window and filter it to smooth out the air flow into the carb venturies.
Thursday, April 22nd, 1999 at Planet Hot Rod
Background Info: We've been to the strip twice and haven't managed to nail down a lot of little problems with high RPM bogging, proper timing and fuel settings. A chassis dyno is just like being at the strip but you are working in controlled conditions with computer monitoring and logging of all critical data. The car is placed on rollers and is accelerated through all of the gears to redline RPM while the data logging occurs. It is very cool to be there and watch the car lift up and rip the rollers with the slicks!
Preparation Work for the Dyno: The most informative approach would have been to take the car into the chassis dyno test "as is" directly from the strip last week. Then, when changes were made, we would be able to see the exact % improvement we were making. But since the changes to the ignition system were very time consuming, and the dyno time was limited and costly, we came prepared to run "out of the box" with our best effort, tuning wise. Prep work included replacing the distributor cap with a racing style "adapt-a-cap" that allowed us to set the "phasing" of the cap to line up exactly with the ignition firing (coil firing = rotor being dead center to the associated spark plug electrode inside the cap). We did this because our phasing with the non-adjustable cap was WAY off and was the #1 suspect reason for the previous high RPM misfire. We also noted that at high RPM, the ignition retarded up to 4 degrees due to distributor/gear flexing - the only way to fix this is a crank trigger which we'll look into down the road. We also bumped up the BG400 fuel pump line pressure from 19 to 25psi.
Pass #1: The car ran cleanly all the way to 7200RPM (redline) in each gear, putting about 500hp to the rear wheels (about 660hp to the flywheel). The plugs were checked and they looked lean so we bumped the carb jetting from 83/90 to 86/93 for the next pass.
Pass #2: The car picked up an average of 10hp at the wheels. For the next pass, we gapped the plugs wider from 0.030" to 0.040".
Pass #3: The car picked up an additional 15-20hp at the wheels at all RPMs (it really liked the wide gaps!). Since the plugs still looked a little bit lean, we bumped the jets up again to 88/95.
Pass #4: The data for this run was lost but the car didn't loose power (it gained a bit more at the top end but not much). Time for some more ignition advance - we went from 36 degrees to 40 degrees.
Pass #5: The car lost about 10hp - it didn't like the additional timing. Now for some Nitrous with 175hp jets (remember, the fogger system on the car is capable of 500hp in the future) and 6psi of nitrous system fuel pressure.
Pass #6: The car picked up about 145hp at the wheels (around 800-825hp at the flywheel) and ran cleanly all the way to redline. The plugs looked a bit lean so we bumped the nitrous system fuel pressure to 7psi.
Pass #7: The car hated the additional fuel and bogged terribly. Wrong move. After some discussions we agreed that future air/fuel ratio tuning should only be done by changing the fuel jets in the nitrous injectors, not by playing with the fuel pressure which creates huge changes in the A/F ratio.
Summary: We gained 30hp at the wheels (40hp at the flywheel) as part of this chassis dyno tuning session, which puts us at 700hp without nitrous - exactly what our original dyno testing plus computer simulated modifications post testing told us we would get when everything was tuned correctly. Assuming that with the distributor phasing correction, we gained at least 10 hp before we even got to the chassis dyno, we should see a couple of 10ths and some real mph increases on the track. Add the reduction in weight (see below), and it will be really interesting to see how close to running into the 9s we'll get with this combination next week on the motor alone. Add some nitrous with a sticky track, and watch out.
Looking Forward: We're back at the track on Friday, April 30th. We got the trans brake fixed. In the end, we didn't need new valve springs (they were fine at 540lbs open pressure all the way to 7400RPM). We are changing the complete front brake/suspension system to a racing type light weight system next week with new springs too - we are also removing the front bumper. This will not only remove 60-75lbs of dead weight from the car (it will run faster) but we will get much better front end lift and weight transfer. We will also get new tires and will tune up the ladder bars. What will it run? Stay tuned.
Friday, April 30th, 1999 at Mission Raceway
Track Conditions: Great Weather, (sunny & 15 degrees C), but the track surface was slippery early in the day - but later it started to hook up.
Best Timeslip: 9.758 @ 138.84 (1.450 60') on the bottle with 175hp Nitrous jets (yes, we broke the NHRA rules and can't come back to the track until we are certified to run 7.50-9.90s). The 1/8 mile for this run was 6.238 @ 110.96. A previous run netted a 9.877 @ 138.22.
Looking at the non-nitrous passes, we had a combination of track problems and the high end bogging haunting us again early in the day. We stepped down the carb jets from the chassis dyno testing (88/95) to 85/91 and ran a best of 10.595 @ 127.01 (compared to a 10.543 @ 127.37 for the last time out). While we're not sure we solved it, we bumped up the BG400 fuel pump line pressure from 24 to 27psi and during the later part of the day, we didn't see the high end bogging at all.
Constructive Observations:
We drove the car to and from the track. It never overheated in more than 100 miles of driving. Talk about "cool" - running a 9s timeslip and driving home afterwards. We may have overheating problems in the peak of the summer - but we'll have to just wait and see about that.
Running with or without the air filter doesn't seem to affect the car more an 0.5mph. Good for K&N as its only a 3x14 element. Soon we should have a new K&N air filter with a breathable top surface too.
The new front end with the Strange light weight spindles, hubs, "stock" upper A-arms, new Moroso springs, and Strange disk brakes worked out really well - the car is much more controllable and the toe-changes are a thing of the past (there's also less weight up front - we also got rid of the front sway bar). We found out the master cylinder was dead and was only providing pressure to the front brakes so we replaced it and moved the proportioning valve to the front line and reduced the line pressure to the small racing disks to allow about 60% rear bias (the rear disks are much larger, vented, etc.).
The electrical system is working well even though we don't have the Accuvolt installed yet. We have replaced the 10 gauge wire from the alternator to the battery with a 4 gauge wire and the voltage is up generally to where we need it now. We also used our new Honda generator between passes to keep the battery fresh.
The nitrous system is much happier now that we have the fuel pressure set correctly and have a new #6 line (replacing the #4 line) from the bottle to the engine. We also have a fuel pressure regulator bypass line (the old #4 nitrous line) for the nitrous system keeping the regulator from pressure creeping - now the nitrous hits instantly and doesn't bog initially. Picking up 12mph with 175hp jets means we're running "right on the money". Time for some more nitrous!
We replaced the Hoosier 28x10 slicks (worn out from a lot of street use and hard burnouts) with Phoenix (Firestone) 28.5 x 10.5 slicks that have a softer tread compound and more sidewall flex. This created a need to narrow the rear axle before going to the track and grinding out the fender lips to fit them in (they are almost a full 1" wider). They were greasy initially but when the track improved and we had a few passes on the slicks, they really hooked well.
The ignition system and phased distributor cap worked well. We even left in the street plugs and didn't look at them - they fired without fail.
The trans brake worked!
What did go wrong:
Problem # 1: Wrong master cylinder. Too large a piston diameter - therefore very high peddle pressure is required to slow the car down. Will replace with a trick aluminum unit.
Problem #2: That high end bog - is it really gone? There's some thinking that our fuel lines from the trunk are too long and too large - the volume of fuel pushes back on the pump during hard acceleration and starves the carb. We might try a #8 line instead of a #10 line. Not sure.
Problem #3: The car is heavy and the slicks are small - not easy to hook a lot of power to the track. It will be really important to have a good track surface when we step up to larger amounts of nitrous. We are going to add a plate nitrous system (2 stage - off the line on the plate and down the track on the fogger) to avoid hitting the tires to hard with all of that nitrous torque. We are also looking at a long term project of fabricating a new front end that would reduce the car weight by another 200+ lbs and would not only help the car hook better, but would provide a noticeable performance improvement as well.
Problem #4: We had a carb backfire and an under hood inferno at the starting line - the front window and paint was damaged during the fire fighting process. Time for a new windshield and some careful paint repairs. We will add an under hood Halon fire suppression system soon as well.
Problem #5: We found metal particles in the heads. We're almost positive its the stock valve spring shims getting eaten by the stiff racing springs. Looks like we need hardened steel valve spring seats - not easy to add without pulling the heads - and that means pulling the motor, trans, and exhaust system. At least that would give us a chance to fix the oil and coolant leaks in the engine.
Looking Forward: Certify the car for 7.50-9.90 by adding the remaining safety equipment, getting our medicals and licensing from the NHRA. Change the master cylinder (again), add the 2 stage plate nitrous system (we'll start with 200hp on the plate and 200hp on the fogger), fix the valve spring seat problem and oil/coolant leaks (pull the engine and tear it down - add head studs, cam belt drive and crank trigger system), fix the broken window and paint, add Momo carbon fiber seats, add a proper cowl air intake system with high flow filtration, add the Halon fire system. Also finish off the rest of the interior and repaint the things that got bent, scratched or otherwise abused during the last 6 months. And . . . get back to the track on May 22nd and try it all out again.
Derek's "Hall of Shame" - May 1999:
Yes, that's right, this is the no holds barred self inflicted abuse section. Read all about the mistakes and lessons learned.
1. Street car or race car? Which one is it?
This is a much tougher question than first meets the eye. I didn't fully think this one through when I started out on this project and it cost me a lot of money, time and frustration. A street car must pass certain legal hurtles such as having the correct safety equipment and accessories installed, and in the case in Vancouver, BC, passing tough emissions tests. But a street car can also mean comfort, convenience, quiet operation, and perhaps most importantly, originality (how close does the car look to the original?).
My original definition was "no compromise" in the street parameters, but also a pretty fast and safe race car. Fast is a relative term and I've yet to meet anyone in the automotive world that didn't catch the "more is better" bug at some point or another. Fast is cool, fast means FASTER than the other guy, and fast means status. So on the journey I went.
At first I was satisfied that the original 396 motor could meet my goals, without nitrous or any other power adder. A nice mid 12 second ride that didn't require a roll cage or other seriously compromising race safety equipment. Then I figured, hey, those new crate 502s from GM looked kinda cost effective - by painting the block 67 "orange" no-one would know the difference - and I could then have an 11 second ride. Well, you know, the 502 responds really well to the application of speed parts (cam, head porting, bumping up the compression, etc.) and since we were going to make sure the block was "true" from a machined tolerance perspective, it wouldn't hurt to change a few of the internals while we had it apart.
So we changed the pistons (more compression), rods (insurance), heads, cam, lifters, rockers, oil pan, etc. and headed to the dyno with 2 different manifolds and 2 different carbs. Tossing the 2 manifolds and yanking the heads was very much necessary, because, you see, with just a bit more power out of the motor, we could surely run 10s. Porting the heads, angle milling them, adding larger valves, a bigger cam, and another manifold later, we had a motor that wouldn't let us down at the strip. Hah!
We had crossed the line and the car now needed a rollcage. Damn. But we were going to install a cage that no-one would notice and would still allow a full stock interior to be installed. Off to the fabricators. Oh, and while we were at it, why not add a tubular subframe to add additional stiffness to the chassis and a nice 20 gallon racing fuel cell in the trunk.
Now, with a 10s time slip available to us, that nice rebuilt 12 bolt rearend and modified stock style 4 link suspension just wouldn't do any more. Those new brakes, front and rear also would have to go. For that rear end, we needed something that we could tune and something that wouldn't break every time we went racing. So, we might as well cut out that tubular subframe and build in a proper ladder bar setup with that Dana 60 and race axles we were dropping in. And that fuel cell - we mounted it too high to pass NHRA rules so we had to cut out the trunk flooring and build a lowered steel box to mount it in - and add additional holes for the 2 massive fuel pumps to mount them in. Still a street car, no problem with those coilovers hanging down under the rear bumper for everyone to see and the fuel cell plumbing, pumps and filters. And again, to improve stiffness, why not box in the stock frame rails and build a new transmission cross member while we were using the welder . . .
Now with that trunk looking kinda busy with that fuel cell and racing fuel pumps in the middle of it, it wouldn't hold any golf clubs anymore, so why not mount the battery in the trunk as well? And with the safety equipment in place to run 10s, why not shoot for the 9s or even the 8s by adding a fogger nitrous system and throwing a bottle beside the fuel cell in that useless trunk. With the nitrous, a larger carb also seemed like a prudent thing to include.
You know, that new TCI TH400 transmission and 10" converter just didn't seem to be up to the task of holding together under all of that 500 cubic inch nitrous fed big block power any longer. Time for a nitrous capable trans and converter from Turbo Action. And while we're at it, why not toss that sissy stock looking shifter and put in a full race Cheeta unit with a custom fabricated center console. Hey, that would also allow us to install a lot of cool racing gauges and switches.
Now launching a car with more than 1000hp would be tricky without some smart electronics so in went the progressive nitrous controller and launch control electronics, including the dual line locks. And with most of the car's stock wiring system completely useless now, it would also be a good idea to wire up a full electrical system race control panel. And we needed a big 5" tach and some bright oil pressure and redline warning lights within easy visibility of the driver's eyes as he blasts down the track.
And that wimpy MSD 6AL ignition system - well it just looked out of place with all of that trick race hardware so in went the MSD 7AL-3. More is better, right? And that water pump needed to go too now that we had the electrical control panel that allowed the use of an electrical water pump - and wouldn't the new pump reduce parasitic drag on the engine and provide more power to the wheels?
So off to the race track we went with our new car, 2 years late.
2. TH400 Automated Transmission - Trans brake or not?
You see, I was sure that I could avoid the use of a nasty trans brake. There was no way I was going to be forced to install a reverse manual valve body trans brake system and have to drive a manual transmission on the street. It would ruin the streetability of the car.
It was clear after the first launch at the race track that the brakes could not hold the car from pushing through the lights at the starting line. We couldn't load up the stall on the converter at all and the effort to drive the car this way was too much. In went the trans brake, which required a new steering wheel with a launch control button and cable to get tangled up when driving around corners. At least we could achieve a clean launch at the strip.
3. Which Chevy big block, Mark IV or Mark VI?
The new Mark VI block just seemed like the way to go. Bigger, stronger, more dimensionally accurate. Straight lifer bores - we couldn't go wrong.
Then we found out that we were the first guys in the entire world to receive one of these blocks and there were very few after market parts that would work with them. More machining, hair pulling, days, weeks and dollars gone by. The good news is that the situation has improved, and now that we are on our 3rd re-build, parts are becoming easier to come by. And if we ever want to bore the cylinders out to 4.600 it's no problem for this block.
4. Nitrous setup - do's and don'ts
I can already write a book on this subject and we haven't even got the nitrous system to 1/2 of its potential.
Why did things not go well at the start? Try poor technical information from NOS systems. They have this completely incorrect specification that says "set your fuel pressure at 6-7 psi and run your fuel jets 4 sizes larger than your nitrous jets". And take 2 aspirin and call me in the morning. Here's the truth about fogger systems (and a lot of this applies to plate systems as well):
1. Use a fuel system that is completely separate from the carb fuel system.
2. Use a regulator that has a bypass line back to the trunk that allows the fuel pressure to be set very accurately with no pressure creep.
3. Run 6.0 psi fuel pressure. Even very minor changes in pressure will make huge changes in the air/fuel ratio.
4. "Square" jet the fuel and nitrous, or even slightly undersquare the fuel jets (run a bit smaller than the nitrous jets). Otherwise you will run too fat.
5. Go for the #6 nitrous line and avoid any restrictions in the nitrous supply plumbing. #4 lines and nasty fittings can really hurt the nitrous flow.
6. Really purge the nitrous system just before you launch.
7. Run a bottle heater and make sure that the nitrous pressure is at operating levels. Again, NOS calibrates their jetting tables at 900-950psi bottle pressure which requires a bottle temperature of 80-85 degrees F but their bottle heaters only warm the bottle to 75 degrees F. Go figure - this means that the system will run too rich - again, use smaller fuel jets than they say but keep an eye on the bottle temperature in the heat of summer.
5. Big heads, little heads, more or less cam? Where should the power be? And that torque converter stall speed?
All of my research shows that racers in general use cam profiles that are far too large (same with carb sizing). They like the sound of open headers, a big cam, and the bragging rights of big horsepower numbers for their motors. But torque moves a car down the track, and a street car is heavier than the average pure race car so torque is where it's at. It's a simple bit of math - cars don't operate at a single RPM, they operate over a range of RPM and the average power over that RPM range is what racers all need to focus on building.
So, I started with heads that were too small for the size of the motor and had to port them. We are now switching to larger heads but not huge - around 320cc intake volume, and around 360cfm of flow at 0.650 valve lift. This is good for 750+hp. The point is, bigger isn't better. We could stay with our smaller oval port heads which are making 700hp with lots of torque but we are into incremental improvements and feel that a bit more breathing is in order.
Now cams are a point of view that no-one seems to agree with me on. I trust my handy engine software simulator. It tells me what my seat of the pants confirms - up to a point (about 250 degrees of duration at 0.050" for a big block) if you have good heads, you will build power everywhere without killing low-end torque and will net out the best possible compromise of "area under the curve". Once you go over 265 degrees of duration, any power you gain at the top will be stolen from the bottom. Depending on the converter, this could mean building top end power but going slower down the track. Another point is about lobe separation. Most race cams (non-nitrous) run a 108-110 degree spacing, but our experience shows that nitrous grind cams with 112-114 degree lobe spacing and larger exhaust duration actually produces more top end power without significant losses in low end torque. This means a broad power curve. And a street car needs to idle and cruse. So, I don't have a ton of experience with this subject but I think I'm on to something.
And again, running a torque converter above 4000rpm stall on the street is a bad move. And a 6000rpm stall converter doesn't add up to more than 0.1 or 0.15s in ET at the strip improvement so why go there? There's a big improvement up to about 3500rpm and from there, it's too stressful to live with.
6. Street roller cams vs. billet race cams, spring pressure, cam gears, spring shims, etc.
Back to the dumb moves category. Running a street roller cam entails a softer cast core which means not going too heavy on the valve spring pressure. We want to rev the motor to 7400rpm so we're at (or above?) the limit of a cast core (our cam). We have 190lbs closed, 540lbs open pressure. But we forgot to use hardened spring shims and ended up with a motor full of metal particles that killed all of the bearings. Also, we couldn't (at the time) get a true roller timing chain so a heavy duty "silent" type of chain was used with a soft cast cam gear and it was literally destroyed by the valve springs and the solid roller cam. We're learning.
7. Setting up the fuel system properly
A BG400 fuel pump needs a #12 line from the fuel cell. We used a #10 and the pump cavitates. We also screwed in the 1/2"NPT input port fitting too far into the BG5000 filters and blocked the flow by hitting the filter unit internally. This creates unwanted restrictions to fuel flow and you end up chasing high RPM bogging at the strip. Told you. Why did we use a #10 line - because the fuel cell only came with a 1/2" port and we didn't want to go to the effort of welding up a #12 port.
8. Street type front-end vs. drag race front-ends
I guess it depends on the car, but I thought I could get away with heavy street type brakes and spindles, control arms, etc. I ended up with a stiff front end and a car that handled poorly down the track. A full Strange front end solved all of the problems and made the car launch and feel much better. We haven't got the time slips to show for it but we're sure this is going to help us in the long run. We also tossed the sway bar and didn't experience any nasty stability problems. I'm sold.
9. Spark plugs
We made a lot of additional power by running 0.040" plug gaps. I guess you need a good ignition system but again, I'm sold on running 0.055" on the motor and 0.040" on nitrous. We also are running with plugs that are a bit cold for non-nitrous use but they are fine - we even drove to and from the track without changing them once.
10. Compression for a street/strip car, racing gas, octane requirements
Everyone seems hung up on running 9.5:1 compression for a street car. This is BS. We're at 11:1 with aluminum heads and a modest race cam and we have NO PROBLEMS with 94 octane street gas. We run 110 octane at the strip with the nitrous but it kills power on the motor alone. Compression rules.
11. Electrical system - voltage, battery charging, and trick new Gell Cell batteries
Gell Cell batteries are temperamental. Don't let them sit without charging for 2 years or they will not accept a charge, will kill your alternator, and will drive you insane. You'll have 11 volts to your electronics if your battery is in the trunk. Also, run a #4 AWG wire from the alternator back to the trunk mounted battery or your charging system won't be very effective. We learned.
12. Headers - a pain in the ass
OK, what does this have to do with anything? Well, exhaust headers are a big part of producing power and having them correctly sized means everything. I just have to admit that the headers on this car are from hell - they have an interference fit with literally everything under the hood. Next time, we'll cut off the front end, fabricate a new one out of chromolly, remove the fender inner panels and build a custom set of headers that actually fits the car.
13. Extrude-hone flowing the intake manifold? Try again
I went high tech and paid a premium to have the intake manifolds abrasively ported by this method. It resulted in very uneven air flow to the different cylinders - turning good manifolds into junk. Stick to late model fuel injection type manifold applications if you want to try this technology.
14. Mufflers - a power loss?
I finally got smart and figured this one out. No, racing type mufflers don't cost any power at all. But you still might go slower because of all of that weight hanging down under the car. If you are lucky they will actually add enough power to break even on the deal. But I'm hooked on the sound of a race car with mufflers - that is the sound of true power. Walk softly and carry a big stick.
Engine Re-Build - part 3 - June 1999:
The current engine has seen a lot of the 7200rpm rev limiter (street racing!), numerous chassis dyno pulls and about 30 trips down the track. After finding metal in the oil we decided to pull the engine - and holy cow - good thing too, as it was about to pack it in.
Where did that metal come from?
Well, we were pretty sure that those stiff valve springs were eating into the stock shims and they were. Big time. Who put those stock shims in there anyway? But the biggest news came when we pulled off the timing cover and found the "silent" cam chain drive cast iron sprocket all chewed up. Seems that it didn't take kindly to the abuse of high RPM and a solid roller cam with stiff springs. So what happens when an engine gets full of metal particles? It eats the crap out of the bearings for one, and it scuffs up the piston skirts as well. Time for a re-build.
What to do? Should we "improve" things while we're at it?
Yup. Again, rule #1 - more is always better. Here's the list of the changes (read "new motor"):
1. New bearings everywhere. Polish the crank to get rid of the scratches in the main bearing journals.
2. Fix the main bearing caps that were "walking" and re-line bore the main bearing caps (loose main caps are a bad thing).
3. Replace the bolts for the main bearings with studs. Same with the heads (more torque can be applied to keep things in place with studs and nuts).
4. Change over to a state of the art Jesel nylon belt drive system for the cam (less power loss, much improved engine harmonic dampening, and top notch reliability for race applications). Add an MSD crank trigger system for the ignition system to maintain perfect timing at all RPMs too.
5. Heads? Did I say new heads? No, that would be extreme. Or would it? Hell, time for some real heads that flow! We have new GM/Edelbrock rectangular port heads, CNC ported by Mick Chapman Racing Heads (called "Victor Juniors"), with 320cc intake ports, 2.25/1.90 valves and that flow about 350/270cfm I/E at 0.700" lift, that will receive additional modifications by Terry Kershaw to open up the intake bowls and add ccs to the runners. We also have a new Edelbrock Super Victor intake manifold to match these heads.
6. Cam? Did I say new cam too? Gee, with all of that head flow potential, why go cheap with the existing cast iron core cam? We need a serious billet steel core racing cam so that there is no chance of cam wear (and we can put in stiffer springs to avoid any possibility of valve float at high RPM). The original cam was 244/244 @ 0.622" - 110, the last cam was 257/265 @ 0.652" - 114 (nitrous grind), and the new one is a custom Comp. Cams billet at 262/270 @ 0.714" - 114. This cam and head combo should rock!
7. There better not be a #7 - no way, that's absolutely it. Promise. Double promise - sort of. Now let's get this thing buttoned up with the new 2 stage 500hp Nitrous system and get back to the track and put down some passes with a properly certified car and drivers. When? Stay tuned.
PS - We have stepped up to Jesel shaft mounted rocker arms as they almost completely eliminate the need for periodic valve lash adjustments. Very expensive but very trick too.
Specs for our New Motor - July 9th, 1999
Same block (Mark VI, 502)
Studs for bottom end & cylinder heads
New Cam (262/270 @ 0.714 - 114)
New Heads (Edelbrock Victor Junior CNC - see more below)
New Springs (330/660lbs closed/open) & Titanium Retainers
Jesel Shaft Rockers
New Intake Manifold (Edelbrock Super Victor) with 4150 to 4500 2" carb adaptor
Second Nitrous Stage (NOS Systems 350hp Big Shot plate system)
Jesel Cam Belt Drive
MSD Ignition Crank TriggerHeads:
Edelbrock p/n 6040 - CNC machined rectangular port heads by Mike Chapman
2.25/1.90 valves (old heads were 2.25/1.88)
315/110cc rectangular intake/exhaust port volumes - before porting (old heads were 290/110 oval ports - before porting)
112cc combustion chambers - before milling (old heads were 110cc before milling)
345/276cfm intake/exhaust flow at 0.700" valve lift & 28" - before porting (old heads were 309/218 - before porting)
Porting by Terry Kershaw to take intake ports from 315cc to 330cc and flow from 345cfm to 375cfm (exhaust ports were fully CNC machined out of the box at 280cfm), combustion chambers (also fully CNC machined out of the box) reduced from 112cc to 106cc to match other heads, porting of intake manifold to match headsExpected Results:
1. Software simulated dyno testing with old vs. new head flow data shows a power increase from 660hp at 6500rpm to 770hp at 7000rpm with a loss of about 50ft-lbs of torque loss at the converter launch point of 4200rpm.
2. Loading the above power curves into the software simulated drag strip testing shows the motor only performance going up 4-5mph and lowering the ET by 0.3-0.4s. This means that if we have solved our fuel system problems we might get a 9s pass on the motor alone (original goal and new goal after this engine build up) - making 8s on 2 stages of Nitrous is only an issue of available traction now.
3. More reliable - no metal from valve springs beating the seats to death or a chain cam drive to wear out (the Jesel drive also reduces harmful engine harmonics), at least 500rpm higher redline too
4. Easier to launch with 1st stage of Nitrous due to loss of some bottom end torque - should help lower ET by 0.1s over previous setup which required a softer launch
Our Long Road to Mission Raceway for this Friday:
This was to be our test & tune and car/driver certification day - but it was not to be. A week of late night thrashing resulted in the car being completed at 1am today but after a quick shakedown test on the city streets it became apparent that the TH400 transmission had lost 2nd gear. At 4am the transmission was out of the car and by 9am it was in the hands of the folks at All-Tech Transmissions for a re-build. After disassembly, it became apparent that the 2nd gear sprague had gone away. Some hunting for new parts and further machining work and we had the transmission back in the car and off to Mission for a 3pm arrival. But it was too late to run so we left the car there for the night and will run it Saturday/Sunday along side the Pro Mods. Stay tuned.
Certifying the Car, Breaking the Rear End, July 10-11th, 1999
Certifying the driver and car:
We certified the car to run in the 7.50-9.90 bracket as well as getting his personal NHRA drivers license for the 7.50-9.90 bracket. All went well and we got 6 passes in and got certified. We can now race! As you read below, remember that certification means performing a number of partial passes while under close scrutiny. No balls to the walls antics.
First passes on the motor:
It was 100 degrees (air temperature) and the car felt a bit lazy without the Nitrous. But the good news is that the fuel problem is long gone - it pulled cleanly to 7500rpm without laying down. What seemed missing was that mid-range "grunt" that the old motor had with its smaller cam and heads. After talking to Comp Cams and other engine builders, we've decided to advance the cam +4 degrees to shift the power band down a bit. Never the less, the power band was where we expected it - a lot more top end revving and a softer bottom end to allow us to run out of the hole with the first stage of nitrous on.
Adding some Nitrous:
We again ran with the smallest jets - 24/24 for 160hp and set up to trigger 0.3s after launch. It pulled the wheels up for 30' and hooked to the tune of a 1.40 60' time. There's more in the setup yet so look for 1.35s 60' times in the future!
We had to shut down before the 1000' mark and ran a 9.87 @ 113mph - good for a 9.30-9.40 on a full pass.
On Sunday we bumped the jets to 28/30 and spun the tires all the way down the track - posting a lazy 9.76 @142mph with a 1.57 60' time. But something else was wrong - the right front wheel was up 2' while the left front wheel was only up 6" and the car was getting really loose down the track - this wasn't the same car that had just pulled a very clean 1.40 60' time the day before. Back at the garage, we found out that the Dana 60 axle tube spot welds had broken and the axles were bent - good thing we had additional chromolly tubes holding it together to the ladder bars.
A Busy Race Weekend - July 24-25, 1999
This was a weekend full of poor weather and the likes of Warren Johnson and his Pro Stock coming to the Mission Raceway Park. Only time for a few passes all weekend long. Slicks started to vibrate at high speed - time for a re-balance.
Summary:
Ran with the Nitrous fogger set to 24/24 jets (smallest tune) and nailed 2 separate 9.59/9.60 passes at 142-143mph. A bit boring, but it showed the the car is responding to changes and that it is getting more reliable and fast.
Time for the 2 stage Nitrous system and a dominator carb (4500 series that properly matches the 4500 Edelbrock Super Victor manifold we now have).
Trying Out The 2nd Stage Nitrous System, Aug 7-8th, 1999 (9.12s at 150.7mph)
Weather:
70-75F, high humidity, good track conditions.
The Nostalgia Drags:
This was a weekend of 1960s nitro dragsters running 7.50s @ 197mph - a blast to watch. We showed up with the goods and ran a series of hot passes: 9.30, 9.23, and a 9.12 at 150.7mph (1.43s 60' time, 5.9s @ 121mph in the 1/8 mile). The setup was simple: 24/24 jets on the fogger (160hp) coming on 1.3s after launch, and the plate system at 85/92 jets (240hp) coming on 20% initial power at launch and 4s to full power. Solid, reliable, and repeatable. We changed to 26/26 fogger jets and blew the run by hitting the rev limiter in both 1st and 2nd gear - we need a big shift light that is easily visible by the driver. We could have run a 9.0 or an 8.9 on a clean pass with a bit more power.
We also made an accidental non-nitrous pass (forgot to turn on the 2nd fuel pump) and ran a 10.0 @ 133mph which shows that the 1150 Dominator Carb made additional power over the old runs with the new motor in the 10.4 @ 130mph range. This engine likes a bigger carb than the 1025 BG Gold Claw 4150 carb and spacer that we had on previously.
Summary:
Nice ending to the 1999 season after all of the developmental struggles
The 2000 Racing Season
As of July 1, 2000, we retired the Chevelle from active racing. We put a very powerful engine in the Chevelle for the 2000 CPSA races and it proved challenging to hook that power to the track, even with a new 4 link rear suspension and wider tires. Time slips approaching 160mph using a progressive nitrous controller set to 8s to full power showed that the engine was producing 1300-1400hp.
We ran some impressive time slips and enjoyed the awesome power of the new motor, but in the end, the motor-chassis combination was happier and more reliable at the sub 1000hp level.
Here's the history of the changes to the Chevelle for the 2000 season:
After finally blowing the composite head gaskets in the 502 motor last year and bending the Dana 60 rear-end, we retired the Chevelle for the season in late August 1999 (after winning the CPSA 10" tire class but before the twin-turbo Buick arrived in late September from Dawson to steal the title back from us) with a best of 9.12s on slicks and 9.30s on DOT tires. The Chevelle was going much faster than we initially designed it for and there was a serious risk of major component failures across the complete drivetrain (from the engine to the rear-end). Danny simply didn't feel safe driving the Chevelle in that "on the edge" state any longer.
After carefully looking at the data gathered from the 1999 racing year, we decided to start over completely for 2000 with a new engine, transmission, rear-end, fuel system, nitrous system, ignition system, suspension system, and chassis design. We literally started over from scratch. And we put aside our partially finished S-10 truck to race the Chevelle for the whole 2000 season - complete with a motor home, an enclosed trailer, and our secret weapon: Darrell.
Click here for a complete historical project overview of this car
Click here for the project photo album of this car
Click here for videos of this car